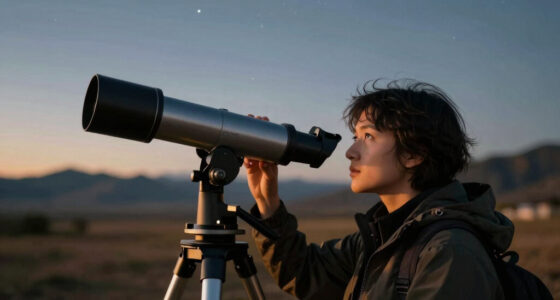
To master night and astrophotography, you should use long exposure shots and set your focus manually to infinity for clarity. Keep your camera stable on a sturdy tripod, and employ remote triggers or timers to avoid vibrations. Experiment with wide-angle lenses, adjust ISO and aperture settings, and try stacking shorter exposures or capturing star trails. Incorporate light painting techniques by moving light sources during long exposures. If you explore further, you’ll access more tips to enhance your night photography skills.
Key Takeaways
- Use long exposures and manual focus to capture star movement and celestial details sharply.
- Stabilize your camera with a sturdy tripod and remote shutter to prevent vibrations during shots.
- Combine multiple shorter exposures or use star trail stacking to create dynamic night sky images.
- Incorporate light painting with controlled light sources during long exposures for artistic effects.
- Adjust ISO and aperture settings carefully to optimize exposure while minimizing noise in low-light conditions.
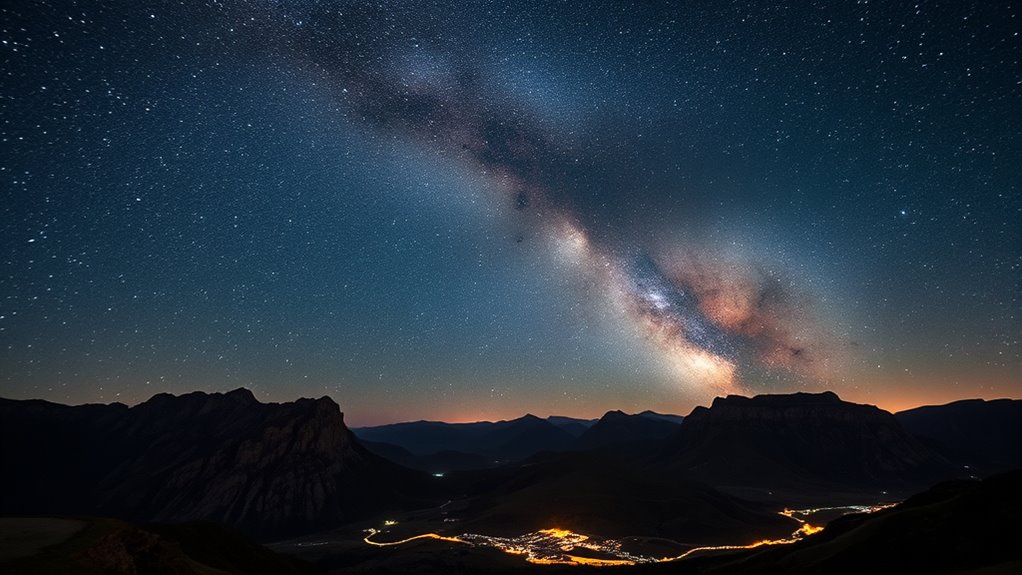
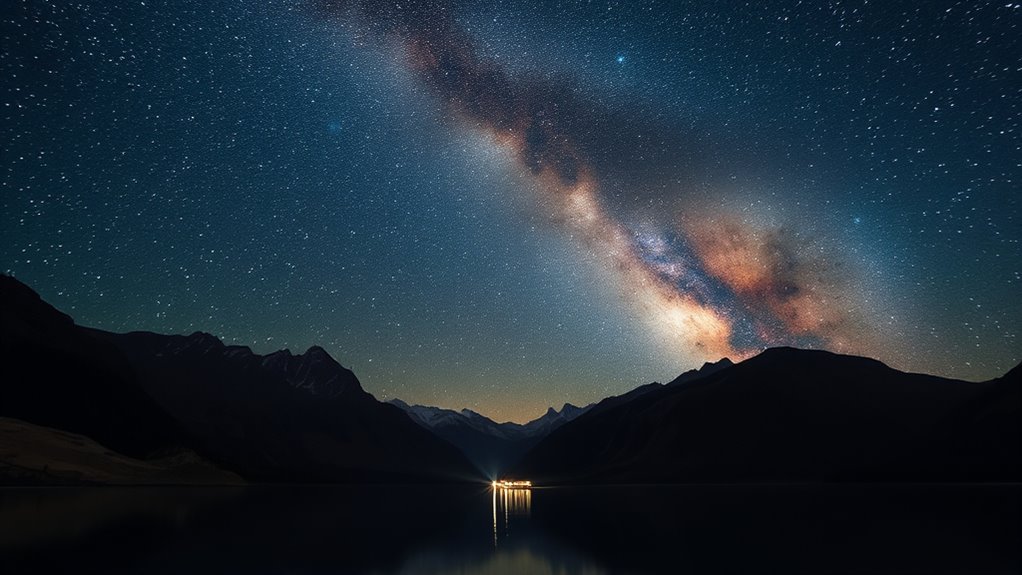
Night photography and astrophotography open up a world of stunning images, but capturing them requires specific techniques and equipment. When you venture into the dark hours, you can create mesmerizing visuals like light painting and star trails that reveal the beauty of the night sky. These techniques demand patience, practice, and the right gear to succeed, but the results are well worth the effort.
Night and astrophotography unlock stunning, celestial images that require patience, skill, and the right gear to master.
Light painting is a mesmerizing method where you use a long exposure to “paint” with light sources such as flashlights, LED sticks, or even sparklers. As you set your camera on a tripod, you’ll manually control the exposure time—often several seconds or more—so you can draw or write in the air during the shot. During this process, you move the light source around, creating streaks, shapes, or patterns that appear illuminated in the final image. To get clean, crisp results, you need a remote shutter release or a timer to prevent camera shake. Adjust the ISO and aperture settings to optimize exposure; a lower ISO reduces noise, while a wider aperture allows more light in. Light painting is especially effective when combined with the dark backdrop of night, providing a stark contrast that makes your light strokes stand out vividly. Incorporating automation through intervalometers or camera settings can help achieve more complex light painting sequences with consistent results.
Star trails are another exciting technique that captures the Earth’s rotation, turning the stars into beautiful, circular streaks across the sky. To achieve this, you set your camera on a sturdy tripod and use a very long exposure, sometimes lasting 15 minutes or more. Alternatively, you can take multiple shorter exposures—say, 30 seconds each—and stack them later using editing software. The key is to keep the camera absolutely still and avoid any movement that could blur the trails. You’ll want to manually focus your lens to infinity and set a high-quality wide-angle lens for the best coverage of the night sky. Use a remote shutter or intervalometer to prevent vibrations. As the Earth rotates, the stars appear to move, creating those beautiful trails that can span the entire frame if you leave the exposure running long enough. This technique captures the motion and energy of the night sky in a way that static images simply can’t.
Both light painting and star trails require a good understanding of your camera’s manual controls, patience to experiment, and a willingness to work in low-light conditions. Once you master these techniques, you’ll find yourself able to create dynamic, awe-inspiring images that showcase the night’s hidden wonders.

K&F CONCEPT 64 inch/163 cm Camera Tripod,Lightweight Travel Outdoor DSLR Tripods with 360 Degree Ball Head Load Capacity 17.6 lbs/8 kg,Cellphone Clip for Smartphone Live Streaming Vlog O234A1+BH-36
【Lightweight and Portable】4 section leg can adjust tripod height from 20.4''/52cm to 64.1''/163cm; it can be folded to…
As an affiliate, we earn on qualifying purchases.
As an affiliate, we earn on qualifying purchases.
Frequently Asked Questions
What’s the Best Time of Year for Astrophotography?
The best time of year for astrophotography is during the new moon phase, when the moon’s light is minimal, and light pollution is less impactful. Fall and winter often offer clearer skies and cooler temperatures, reducing atmospheric disturbance. To optimize your shots, plan around moon phases and choose locations away from city lights. This combination guarantees darker skies and better visibility of stars and celestial objects, improving your astrophotography results.
How Do Weather Conditions Affect Night Photography Results?
Weather conditions can make or break your night photography. Clear skies are ideal, but if the moon’s full glow or light pollution dominates, your shots suffer—think of it as nature’s way of spoiling your artistic vision. Cloud cover, fog, or humidity obscure stars, turning your cosmic dreams into a blurry mess. Keep an eye on moon phases and weather forecasts; they’re your best allies for stellar shots.
Which Camera Settings Are Ideal for Capturing Star Trails?
To capture stunning star trails, set your camera to a long exposure, typically between 15 to 30 minutes, and use a small aperture like f/8 or f/11 for sharpness. Use camera stabilization techniques such as a sturdy tripod to prevent movement. Focus on star trail composition by positioning your shot to include interesting foreground elements, and avoid camera shake for clear, mesmerizing trails.
How Can I Prevent Noise in Long Exposure Images?
To prevent sensor noise in long exposure images, use a lower ISO setting to reduce sensitivity. Enable image stabilization to keep your camera steady, which minimizes noise caused by vibrations. Additionally, keep your camera’s sensor cool if possible, as heat increases sensor noise. Consider taking multiple shorter exposures and stacking them in post-processing for cleaner results. Regularly clean your camera sensor to avoid dust and debris that can add unwanted artifacts.
What Accessories Improve Nighttime Astrophotography Quality?
To improve your nighttime astrophotography quality, you should invest in accessories like a sturdy tripod to guarantee stability during long exposures, preventing camera shake and blurriness. Additionally, use lens filters, such as a UV filter or a light pollution filter, to reduce glare and enhance image clarity. These accessories help you capture sharper, more detailed shots of the night sky, making your astrophotography more impressive.

Camera Remote Control Wireless Shutter for Canon EOS RP, R6, ROS RP, Rebel T6, T7, T5, T3, SL2, 5D Mark II, 5d Mark iii, 5d Mark iv, 6D Mark II, 7d Mark ii, 7D Series, 5D Series; for Fujifilm X-T3
[Compatible cameras]: Compatible with Canon EOS RP,R,R1,Ra, R8, R100, R10, R6 II, R6,R5,R5 C,R3, R5 Mark II,M5,M6, 1D…
As an affiliate, we earn on qualifying purchases.
As an affiliate, we earn on qualifying purchases.
Conclusion
Now that you’ve mastered night photography and astrophotography, you’re ready to capture mesmerizing cosmic creations. Remember, patience and practice propel your progress, while planning and persistence perfect your pictures. By blending boldness with a keen eye, you’ll produce breathtaking images that boast beauty beyond borders. So go, gather gear, and get gazing—your galaxy of great shots awaits. With dedication and daring, your night-time masterpieces will surely mesmerize many.

Galaxy Projector Night Light Slides, USB Starry Sky Nightlight Projector Lamp Replacement Discs with Wide Angle Vivid & Bright Projection, for Bedroom Sleep Ceiling Wall Car Party Bar Decor (24pcs)
【Realistic Nebula Simulation】Transform your ceiling into a breathtaking galaxy with high-transmittance discs. Featuring accurate 1:1 simulations and superior…
As an affiliate, we earn on qualifying purchases.
As an affiliate, we earn on qualifying purchases.
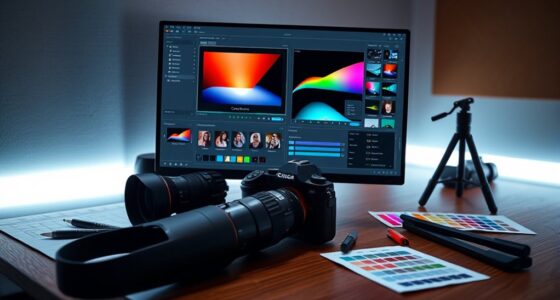
star trail stacking software
As an affiliate, we earn on qualifying purchases.
As an affiliate, we earn on qualifying purchases.