
To achieve sharp, clean edges in vinyl cutting, use the Clean Edge Trick by ensuring proper surface prep, selecting high-quality vinyl with strong adhesive, and calibrating your cutter accurately. Apply transfer tape carefully, pressing firmly to avoid bubbles, and peel at a sharp angle. This technique reduces material waste and touch-ups, giving your artwork a professional finish. Keep exploring to discover step-by-step tips and expert advice that can elevate your vinyl projects even further.
Key Takeaways
- Use high-contrast backgrounds and proper surface prep to enhance visibility and control during vinyl cutting.
- Select vinyl with strong adhesive and optimal thickness for crisp, clean edges and durability.
- Calibrate cutting tools regularly and set appropriate blade depth and pressure for precise results.
- Align transfer tape carefully, pressing firmly from center outward, then peel at a sharp angle to maintain clean edges.
- Maintain tools, replace blades when dull, and store materials properly to ensure consistent, professional-quality cuts.

30 Pack Replacement Blades for Explore Air 2 Vinyl Cutting Blade 45 Degree Cutting Plotter Blades Blades for Maker Expression Vinyl Cutter Machines Deep Cut Blade (Red)
【Compatible】Our vinyl cutting blades are compatible with Explore Air 2 Vinly Cutter, Explore Air, Maker and Expression. Replace…
As an affiliate, we earn on qualifying purchases.
As an affiliate, we earn on qualifying purchases.
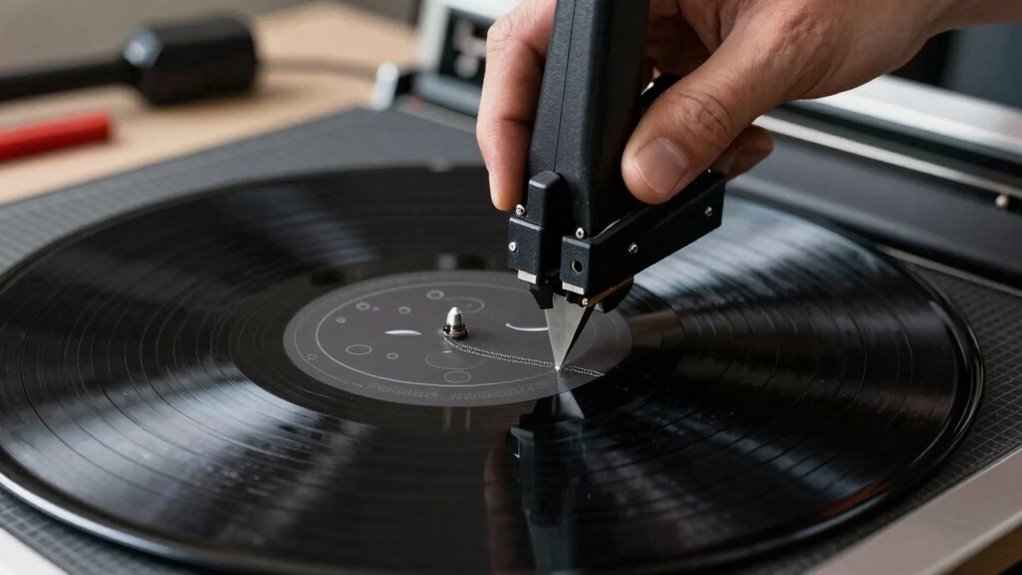
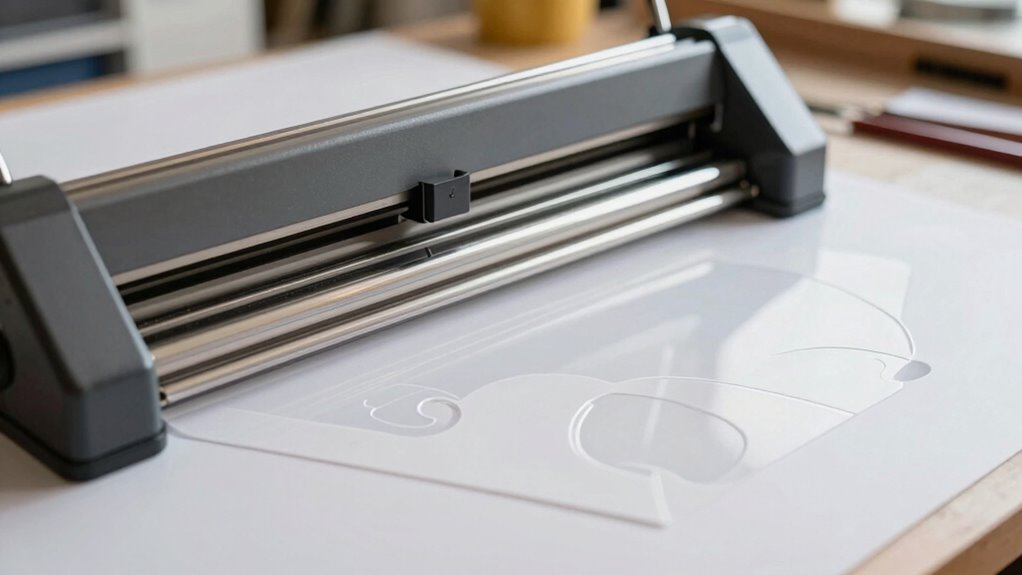
What Is the Clean Edge Trick and Why Use It?
Have you ever struggled with uneven or jagged edges when cutting vinyl? The clean edge trick helps you achieve smooth, precise cuts by focusing on adhesive strength and color contrast. When applying your vinyl, make certain the adhesive is evenly distributed, so the material stays firmly in place. This prevents slipping that can cause rough edges. Using a high-contrast color background makes it easier to see your cut lines clearly, helping you follow them accurately. The trick involves pressing the vinyl onto a contrasting surface to improve visibility and control. Additionally, understanding the importance of proper technique in vinyl cutting can significantly enhance your results. Employing consistent pressure during cutting is also essential to maintain even lines and prevent uneven edges. This technique minimizes mistakes and ensures professional-looking results. Mastering the clean edge trick means you’ll cut with confidence, saving time and reducing waste, giving your projects a polished, flawless finish. Incorporating quality tools into your setup can further improve precision and ease of use, leading to consistently clean cuts. Developing self-awareness about your cutting process can help you identify areas for improvement and refine your technique over time. Moreover, practicing proper maintenance of your tools ensures consistent performance and prolongs their lifespan.

ORACAL 651 Clear Transparent Glossy Permanent Adhesive Vinyl (12" x 10ft)
Durable Outdoor Performance – Premium permanent adhesive vinyl built to withstand sun, rain, and outdoor conditions for up…
As an affiliate, we earn on qualifying purchases.
As an affiliate, we earn on qualifying purchases.
Benefits of the Clean Edge Technique for Vinyl Artists
Using the clean edge technique offers vinyl artists significant advantages by ensuring each cut is crisp and professional-looking. This method enhances color contrast, making your designs pop with sharp, defined edges that draw attention. It also improves material flexibility, allowing you to work on a variety of vinyl types without compromising precision. The clean edges reduce the need for touch-ups or re-cuts, saving you time and effort. Additionally, consistent application of this technique can lead to better cutting accuracy, minimizing material waste. Plus, a polished finish elevates your artwork’s overall quality, making your projects more appealing to clients or audiences. With this technique, you gain consistency in your cuts, creating clean lines that showcase your skill and attention to detail. Achieving cutting precision in your cuts is essential for a professional look and can significantly improve your reputation in the vinyl art community. This technique also encourages attention to detail, which is crucial for producing high-quality work that stands out. Mastering the clean edge method can lead to more efficient workflows, increasing your productivity and profitability. Ultimately, the clean edge trick boosts your confidence and results in standout designs that stand the test of time.

HTVRONT Transfer Tape for Vinyl -12" x 16 FT w/Red Alignment Grid Transfer Paper, Medium Tack Vinyl Transfer Tape for Signs Stickers Decals Walls Doors & Windows
【MEDIUM TACK & CONSISTENT STICKINESS】Transfer tape for vinyl's medium tack ensures a perfect balance between strong adhesion and…
As an affiliate, we earn on qualifying purchases.
As an affiliate, we earn on qualifying purchases.
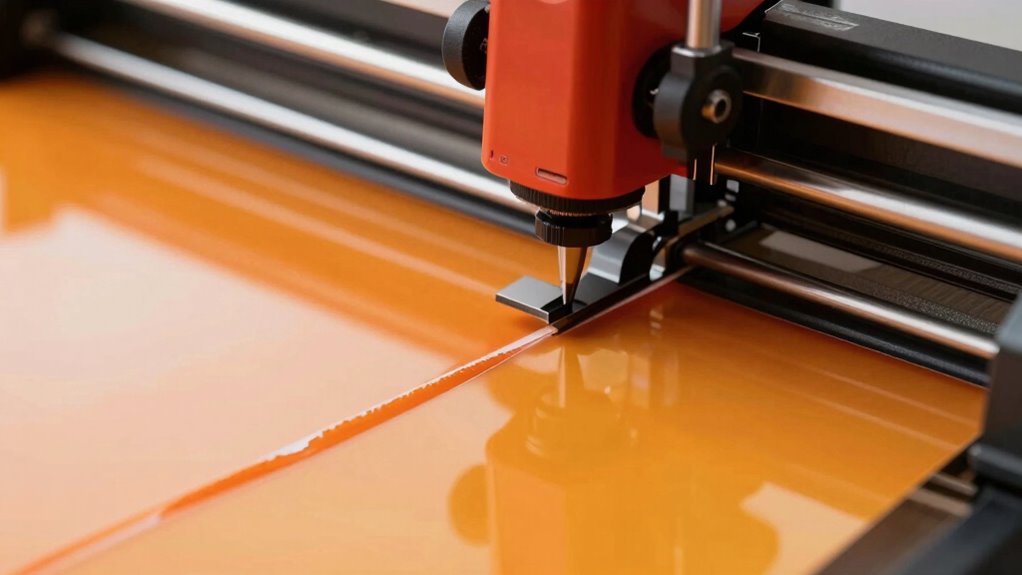
Choosing the Best Vinyl and Tools for Sharp Edges
Choosing the right vinyl and tools is key to achieving sharp, clean edges in your artwork. You need to select the best vinyl types for precision and durability, use cutting tools that guarantee accuracy, and apply techniques that prevent fraying. When you master these choices, your designs will stand out with crisp, professional edges. Incorporating the proper cutting techniques ensures the edges remain smooth and precise, elevating the quality of your work. Additionally, maintaining your equipment and practicing consistent cutting pressure can significantly improve your results. Proper tool maintenance also helps prevent tearing and ensures cleaner cuts every time. Regularly calibrating your cutting tools and using sharp blades will further enhance the accuracy of your vinyl cuts. To optimize your results, consider vinyl selection and how different types may impact your project’s finish.
Optimal Vinyl Types Selection
Selecting the right vinyl type is essential for achieving sharp, clean edges in your artwork. You want a vinyl with high durability to withstand handling and environmental factors, ensuring your design stays crisp over time. Opt for vinyl with strong adhesive strength so it sticks firmly without lifting or peeling at the edges, which can compromise precision. Consider the surface you’ll be applying the vinyl to—smooth, flat surfaces work best for sharp cuts. Thinner vinyl sheets often result in cleaner edges, but make sure they’re durable enough for your project. Avoid overly flimsy options that might tear or stretch during cutting. Additionally, understanding the cultural importance of native craftsmanship can inspire more authentic designs and techniques. By choosing a vinyl with ideal durability and adhesive strength, you set the foundation for professional-looking, clean-edged designs every time. Using appropriate tools and settings also plays a crucial role in achieving perfect cuts and edges. Paying attention to material compatibility ensures your vinyl adheres properly and cuts smoothly, further enhancing your results. It’s also beneficial to stay current with industry trends to continually improve your vinyl selection and techniques. Incorporating proper maintenance and storage of your vinyl supplies can extend their usability and maintain optimal cutting quality over time.
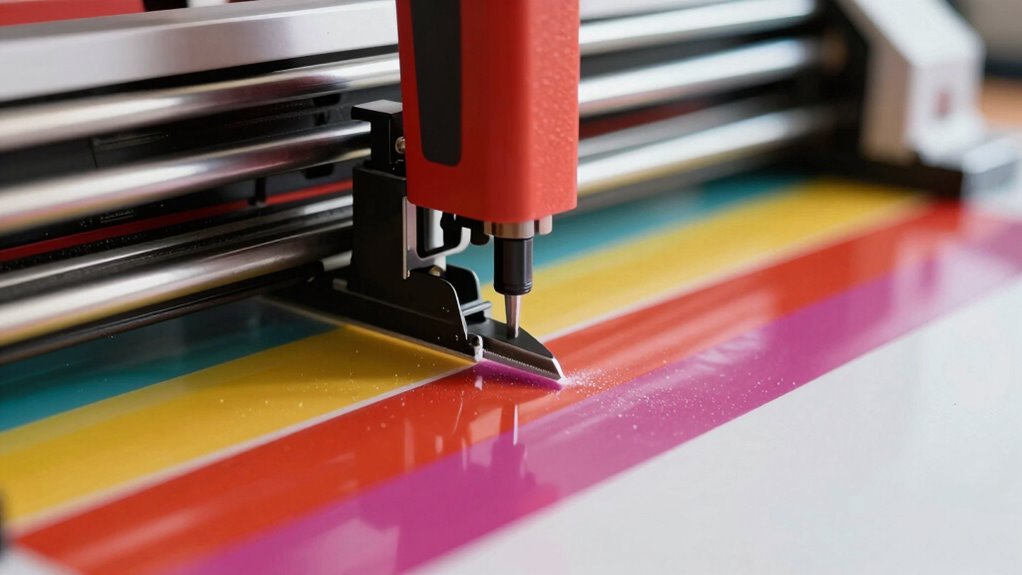
Precision Cutting Tools Choice
The right tools make all the difference when aiming for sharp, professional-looking vinyl cuts. Choosing precise cutting tools ensures clean edges and reduces errors. Opt for high-quality blades suited to your vinyl type, and always keep your cutting mat well-maintained to prevent uneven cuts. Using sharp blades minimizes the need for excessive pressure, preserving your vinyl adhesives and ensuring a smooth finish. Regularly replace blades and clean your cutting mat to maintain consistent results. Investing in the right tools also involves selecting a cutting machine with adjustable settings for different vinyl thicknesses. Proper maintenance, including keeping blades sharp and mats clean, extends tool life and enhances cut precision. Additionally, understanding equipment calibration is crucial for consistent quality and avoiding misalignments. Being aware of the ethical considerations in selecting and maintaining your tools can help you make responsible choices that support sustainability and safety. For optimal results, consider blade sharpness as a key factor in achieving those crisp, professional edges every time.
Proper Application Techniques
To achieve sharp, clean edges in your vinyl projects, it’s essential to use the right vinyl type and application tools. Proper surface preparation ensures the vinyl adheres smoothly, preventing edge lifting. Choose vinyl with excellent flexibility for color blending and precise cuts. Before applying, clean the surface thoroughly to remove dust and oils. Use a precision squeegee to press the vinyl firmly, avoiding air bubbles that cause jagged edges. For ideal results, consider this comparison:
| Vinyl Type | Surface Preparation | Best Application Tool |
|---|---|---|
| Matte | Clean with alcohol wipe | Precision squeegee |
| Glossy | Dry thoroughly before application | Steel ruler or roller |
| Specialty (e.g., glitter) | Lightly sand surface if rough | Soft cloth for smoothing |
Choosing the right vinyl and tools, combined with surface prep, guarantees sharp, professional edges.

NAACOO Laminate/Vinyl Floor Cutter, 13” Vinyl Plank Cutter with Wheel – Just 1 Step Meet Angle&Length Cutting, Flooring Tools – Cuts Laminate Floor, Engineer Wood, LVP/T, VCT, SPC, WPC
🏆【NAACOO Laminate Cutter】- Maximum cutting Width – 13 inches, Maximum cutting Thickness – 13 mm. Multi cutting angles…
As an affiliate, we earn on qualifying purchases.
As an affiliate, we earn on qualifying purchases.
Preparing Your Design and Files for Precise Cuts

To get clean, precise cuts, your design resolution needs to be high enough to maintain detail. Always save your files in clear formats like SVG or PNG to avoid compatibility issues. Make certain your cutting lines are set properly, with the right thickness and placement, to ensure your vinyl cuts just as you envision.
Design Resolution Matters
Ensuring your design has the right resolution is essential for achieving clean, precise cuts with your vinyl cutter. If your resolution is too low, your cuts may look jagged or blurred, affecting color accuracy and the way material texture appears. High-resolution files ensure sharp edges and crisp details, making your final product professional-looking. To optimize your design resolution, keep these tips in mind:
- Use vector formats like SVG or AI for scalability
- Set your document resolution to at least 300 DPI
- Avoid enlarging low-resolution images, which can distort details
- Match your design resolution with the material’s texture for better adhesion
- Check color profiles for consistency across devices
Following these steps helps you maintain accuracy and achieve a clean, polished edge every time.
Use Clear File Formats
Using clear and compatible file formats is key to achieving precise cuts with your vinyl cutter. The right file formats guarantee your design transfers accurately without misinterpretation by the machine. Stick to formats like SVG, AI, or DXF, which preserve vector data essential for clean edges. Avoid raster-based formats like JPEG or PNG, as they can cause blurry or jagged cuts. Additionally, pay attention to your design resolution before saving; high resolution helps maintain detail and sharpness. Properly preparing your files with clean, well-organized layers and outlines makes the cutting process smoother. Using the correct file formats and maintaining a high design resolution ensures your cuts are crisp and professional-looking, minimizing errors and material waste.
Proper Cutting Line Setup
Preparing your design with proper cutting lines is essential for achieving clean, accurate vinyl cuts. Guaranteeing edge alignment and correct blade calibration helps prevent jagged edges or incomplete cuts. Before cutting, verify that your design’s edges are aligned perfectly within the cutting file to avoid misprints. Use your software’s tools to set precise cut lines and double-check the path for accuracy. Regularly calibrate your blade to maintain consistent pressure and depth, preventing uneven cuts. Here’s what to focus on:
- Confirm edge alignment of your design
- Use clean, vector-based files
- Set the correct blade depth and pressure
- Perform blade calibration tests
- Ensure your cutting mat is clean and smooth
These steps will help you achieve a professional-looking finish with sharp, clean edges.
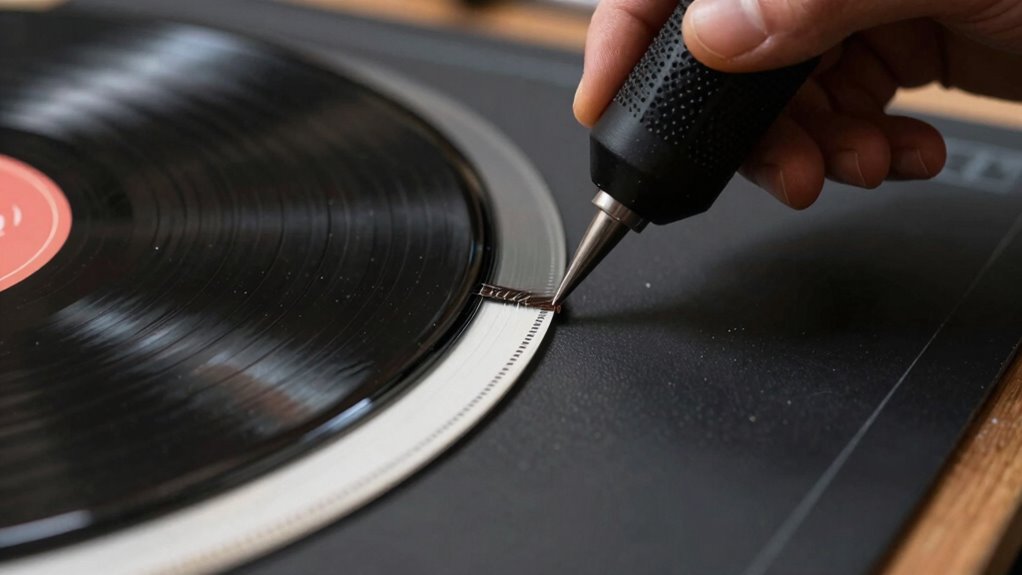
Applying the Clean Edge Trick: Step-by-Step Tutorial

To achieve a crisp, clean edge on your vinyl cuts, the Clean Edge Trick is a game-changer. Begin by verifying your vinyl and transfer tape have adequate adhesive strength for a secure bond. Carefully align the transfer tape with your design, matching the colors for precise placement. Press down firmly, starting from the center and working outward to eliminate air bubbles. Use a squeegee or credit card to smooth the tape, maintaining consistent pressure. Once secured, slowly peel back the transfer tape, keeping it at a sharp angle to prevent lifting the vinyl. This method ensures sharp, clean edges, preventing peeling or fraying. Proper attention to adhesive strength and color matching during application guarantees a professional finish and a seamless, polished look.
Troubleshooting Common Clean Edge Vinyl Problems

Even with careful application, you might encounter issues like peeling, frayed edges, or uneven lines when working with clean edge vinyl. These problems often relate to vinyl durability and adhesive strength. To troubleshoot:
- Ensure your vinyl is compatible with your surface for better adhesion.
- Check if the adhesive strength is sufficient; a weak adhesive can cause peeling.
- Use a clean, smooth surface to prevent frayed edges.
- Apply firm, even pressure during application to improve edge precision.
- Store vinyl properly to maintain its durability and prevent warping.
Addressing these factors helps improve the clean edge result, reducing common issues and ensuring your vinyl stays in place longer. Proper handling and choosing quality vinyl are key to preventing these problems.
Expert Tips for Perfecting Your Vinyl Cuts Every Time
Achieving perfect vinyl cuts consistently requires attention to detail and the right techniques. To guarantee your designs look sharp, focus on precise pattern design, avoiding overly intricate details that may complicate cutting. Before starting, double-check your color matching; selecting the right vinyl hues enhances the final look and prevents mismatched edges. Use high-quality blades and steady pressure to maintain clean cuts, especially around curves. Test your settings on scrap vinyl to fine-tune your machine’s speed and force. When working with complex patterns, break them into manageable sections to improve accuracy. Always clean your cutting mat to prevent slips, which can ruin your pattern design. With these expert tips, you’ll achieve clean, professional results every time, elevating your vinyl art projects.
Comparing the Clean Edge Trick to Other Cutting Methods
The Clean Edge Trick stands out among cutting methods because it simplifies achieving smooth, precise borders without complex adjustments. Compared to traditional manual cuts or automatic blade settings, this technique enhances edge accuracy and boosts cut quality. It minimizes uneven edges and jagged borders, saving you time and frustration. You’ll notice cleaner lines and more consistent results, even on intricate designs.
- Easier to control for sharp, crisp edges
- Reduces the need for post-cut trimming
- Improves overall cut consistency
- Lessens blade wear by avoiding overcutting
- Perfect for detailed, professional-quality projects
Maintaining Your Vinyl Cutter for Consistent Results
To keep your vinyl cutter producing clean, precise cuts like those achieved with the Clean Edge Trick, regular maintenance is key. Proper vinyl maintenance involves cleaning blades, rollers, and the cutting surface to prevent debris buildup that can affect cut quality. Additionally, routinely check and adjust your cutter calibration to ensure accuracy. Misaligned blades or incorrect calibration can lead to uneven cuts or tearing. Keep a schedule for calibration and blade replacement, especially after heavy use or if you notice inconsistencies. Lubricate moving parts as recommended by the manufacturer to sustain smooth operation. By staying on top of vinyl maintenance and calibration, you’ll ensure your cutter consistently delivers professional results, making your artwork look sharp and clean every time.
Frequently Asked Questions
Can the Clean Edge Trick Be Used With All Vinyl Types?
Yes, the clean edge trick works with most vinyl types, but your success depends on vinyl compatibility and edge precision. You should test this method on different vinyls because some, like textured or specialty vinyls, may not produce perfect edges. Always guarantee your blade is sharp and your settings are correct to maintain edge precision. This way, you’ll get clean, professional-looking cuts regardless of the vinyl type you’re using.
Is Special Software Needed to Execute the Clean Edge Technique?
You don’t need special software to execute the clean edge technique; standard vinyl cutting programs work just fine. This method offers incredible design flexibility, letting you achieve razor-sharp edges that seem to defy gravity. Just guarantee your software supports basic vector editing and contour cutting features. With the right tools, you’ll master clean edges effortlessly, creating professional-quality designs that truly stand out—no extra software needed!
How Long Does It Typically Take to Master This Method?
You can master the clean edge trick in a few weeks to a few months, depending on your learning curve and dedication. Skill development varies, but consistent practice helps you become comfortable with the technique faster. While some find it takes longer, regular experimentation and focus on detail speed up your progress. With persistence, you’ll develop the precision needed for professional-quality vinyl cuts in no time.
Are There Safety Precautions When Using This Cutting Technique?
Think of your workspace as a battlefield where safety is your shield. Yes, there are precautions—always wear safety gear like gloves and eye protection, and make sure proper workspace ventilation to clear out fumes. These steps protect you from potential hazards and keep your environment safe. By taking these simple precautions, you can focus on creating sharp, clean cuts without risking your health or safety.
Can the Clean Edge Trick Be Applied to Intricate or Multi-Color Designs?
Yes, you can apply the clean edge trick to intricate or multi-color designs. It helps you achieve sharp, precise cuts even with detailed designs or complex color layers. To do this effectively, adjust your blade depth and use high-quality vinyl. Take your time with each color section, ensuring clean edges throughout. This technique enhances the overall look and professionalism of your detailed and multi-color projects.
Conclusion
Mastering the clean edge trick transforms your vinyl art into a masterpiece with razor-sharp precision. It’s like wielding a fine brush, carving out your vision with unwavering clarity. When you perfect this technique, your creations stand out like stars in a night sky—bright, bold, and unforgettable. Keep practicing, stay patient, and let your passion cut through the noise. With each flawless edge, you’re not just making art—you’re shaping your legacy.