
When you understand embroidery digitizing basics, you can create designs that stitch smoothly and look professional. Choosing the right stitch types, managing stitch density, and using quality thread and stabilizers are key. Proper tension control and testing your designs beforehand also make a big difference. Paying attention to fabric support and collaborating with skilled digitizers helps guarantee your designs turn out beautifully. Keep exploring these skills to make your embroidery truly stand out.
Key Takeaways
- Proper digitizing techniques, including stitch types and densities, ensure smooth, professional-looking embroidery results.
- Selecting appropriate stabilizers and underlays prevents puckering and fabric distortion during stitching.
- High-quality threads and correct tension control contribute to vibrant, consistent, and durable embroidery designs.
- Balancing design complexity with stitch count and density avoids puckering, weak spots, and machine strain.
- Testing and refining designs on similar fabrics help achieve optimal stitch quality and flawless finishes.

Embrilliance Essentials, Embroidery Software for Mac & PC
Compatible with current Windows and MacOS operating systems with free, downloadable updates and disk-free installers available.
As an affiliate, we earn on qualifying purchases.
As an affiliate, we earn on qualifying purchases.
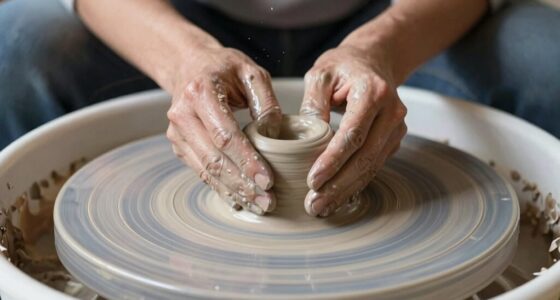
What Is Embroidery Digitizing and Why It Matters
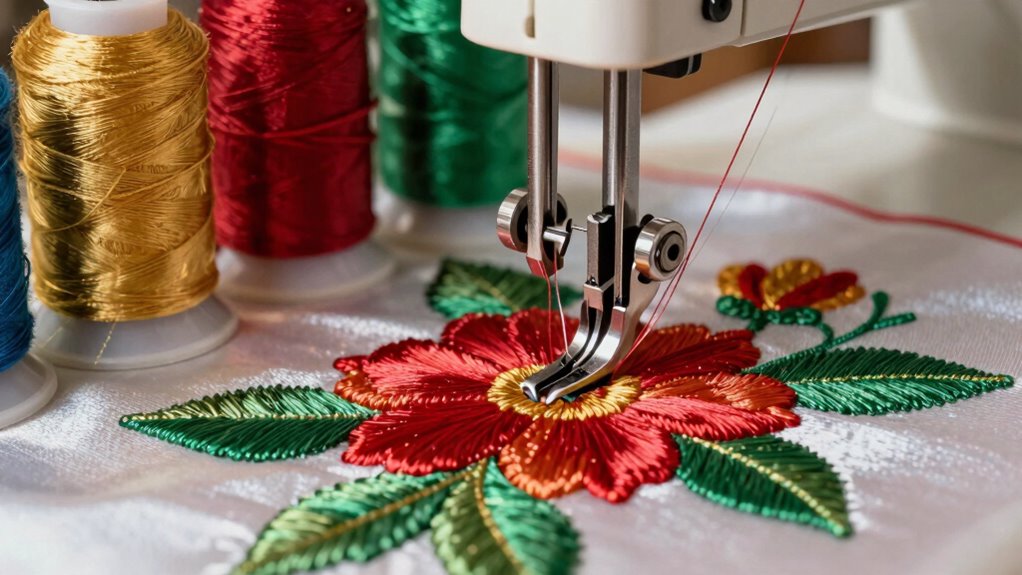
Embroidery digitizing is the process of converting artwork or designs into a digital file that embroidery machines can read and stitch out accurately. It’s vital because it guarantees your design looks professional and clean. When digitizing, you select the appropriate thread color, which impacts the overall appearance and vibrancy of your finished embroidery. Your fabric choice also plays a critical role, as different materials require specific stitch types and densities to achieve the best results. Proper digitizing considers these factors, making sure the design adapts well to the fabric and thread colors. Without accurate digitizing, even the most intricate design can turn out uneven or blurry. Fundamentally, this process transforms your creative vision into a precise, stitch-ready file that guarantees a high-quality embroidery outcome. Additionally, understanding various content formats used in digital design can help improve the adaptability of your embroidery files across different machines and projects.

New brothread Tear Away Machine Embroidery Stabilizer Backing 12" x 50 Yd roll – Medium Weight 1.8 oz – Cut into Variable Sizes – for Machine Embroidery and Hand Sewing
▶TEMPORARY STABILIZER: It provides temporary support for embroidery projects. They are best used on firmly woven fabrics and…
As an affiliate, we earn on qualifying purchases.
As an affiliate, we earn on qualifying purchases.
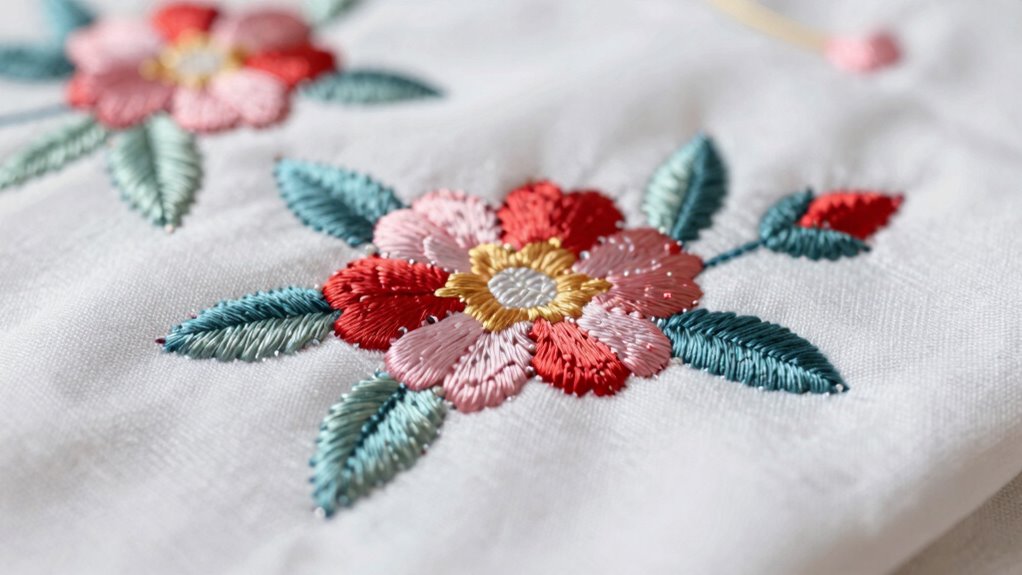
How Stitch Types Affect Your Embroidery Design Quality
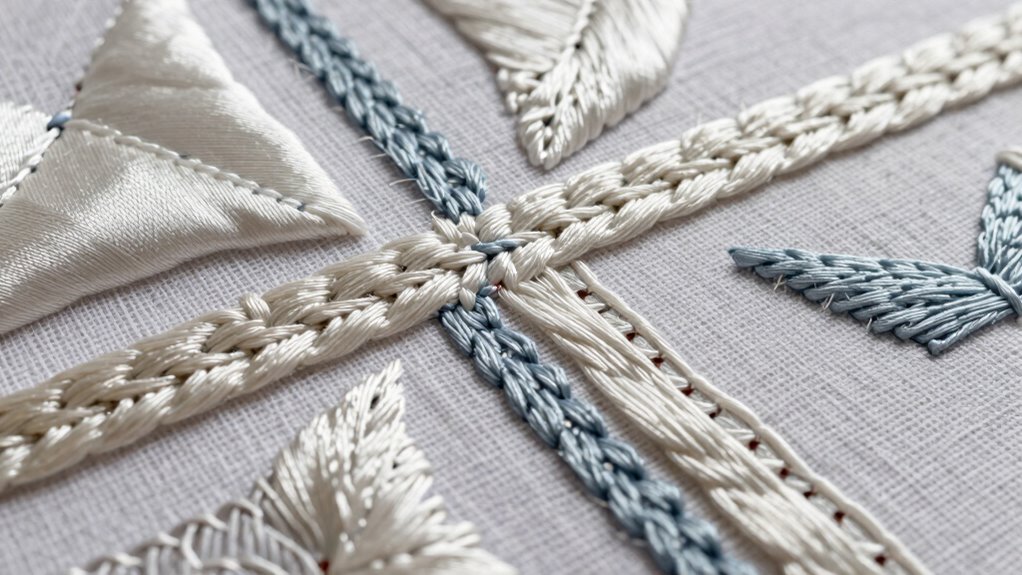
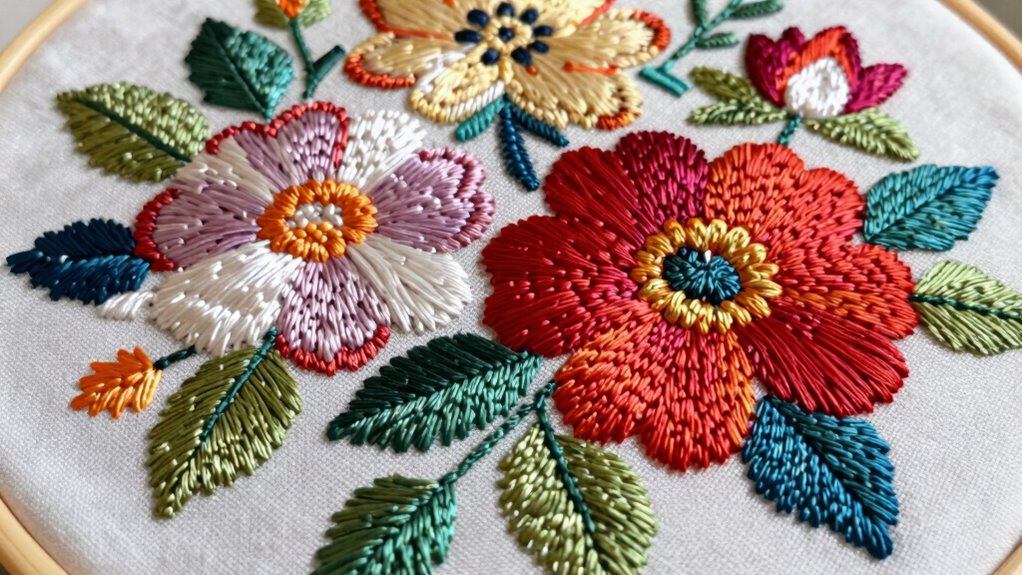
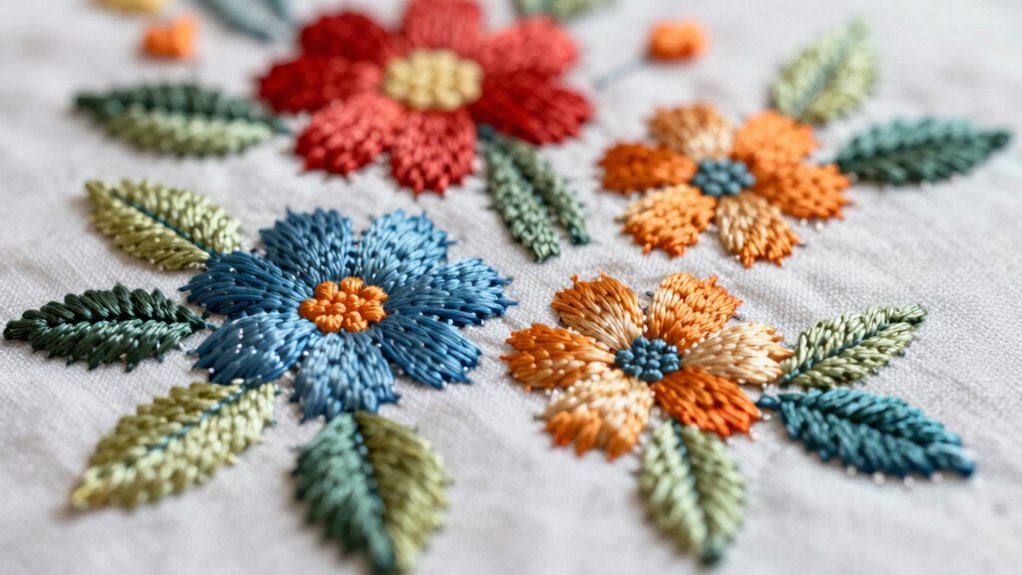
The type of stitches you choose can markedly influence the appearance and durability of your embroidery design. Different stitch types, like satin, fill, or running stitches, create distinct textures and effects. Stitch density plays an essential role; too high, and your design risks puckering or becoming stiff, while too low may lead to gaps and weak spots. Proper thread placement guarantees even coverage and smooth progression between stitch types, enhancing the overall finish. For example, dense satin stitches are ideal for lettering, but overdoing it can cause thread breakage. Conversely, fill stitches need balanced density to maintain a soft, flat surface. Selecting the right stitch type and adjusting stitch density and thread placement accordingly will result in a professional, long-lasting embroidery design. Understanding how stitch types influence the final look can help you make better design choices.
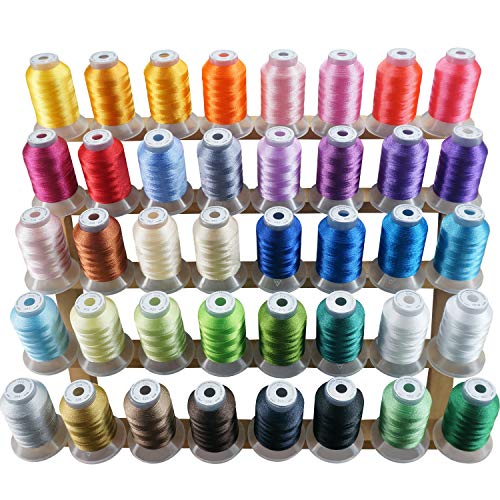
New brothread 40 Colors Compatible with Brother Polyester Embroidery Machine Thread Kit 500M (550Y) Each Spool Compatible with Brother Babylock Janome Singer Pfaff Bernina Embroidery & Sewing Machine
★ 40 SPOOLS PER KIT + COLOR CHART – 40 spools great assorted bright and beautiful colors Polyester…
As an affiliate, we earn on qualifying purchases.
As an affiliate, we earn on qualifying purchases.
Using Underlay and Stabilizers for Flawless Stitches
Choosing the right underlay is key to achieving smooth, even stitches, so consider your fabric and design when selecting it. Stabilizers provide support and prevent puckering, but knowing which type to use depends on your project’s specific needs. By understanding proper underlay and stabilizer options, you’ll create more professional and flawless embroidery results. Additionally, experimenting with different stitch techniques can help you further improve your designs.
Proper Underlay Selection
Selecting the right underlay and stabilizer is essential for achieving smooth, professional-looking stitches. Proper underlay choice affects how stitches lay and influences thread color choices, as contrasting threads can highlight or hide underlay patterns. Color fidelity can be impacted by the type of underlay used, especially when considering thread contrasts. Additionally, the choice of stabilizer directly impacts the fabric’s stability during stitching, helping to prevent puckering and distortion. Hoop selection also plays a role, ensuring fabric remains taut and stable during stitching. When choosing underlay, consider fabric weight and design complexity—more intricate designs need denser underlay. Use a lighter stabilizer for delicate fabrics and a sturdier one for heavy textiles. The wrong underlay or stabilizer can cause puckering or uneven stitches. Keep in mind that underlay patterns vary (tack down, zigzag, or crosshatch), and matching these to your thread color choices enhances overall appearance. Proper underlay selection ultimately creates a flawless embroidery finish, and understanding fabric stability is key to choosing the correct stabilizer. Incorporating knowledge of NEAT can also improve your overall embroidery quality by reducing fabric movement during stitching.
Stabilizer Types and Uses
Using the right stabilizer types and applying them correctly can make a significant difference in achieving flawless embroidery stitches. Stabilizers support your fabric and prevent puckering or shifting, ensuring clean, professional results. There are various types of fusible interfacing and other stabilizers designed for different fabrics and project needs. For instance, cutaway stabilizers work well for dense designs, while tear-away stabilizers suit lighter fabrics. When doing decorative appliqué techniques, choosing a stable, fusible interfacing can help secure the fabric smoothly without puckering. Proper use of underlay stitches combined with the correct stabilizer creates a solid foundation, reducing stitch distortion. Understanding these stabilizer types and their specific uses helps you produce consistent, high-quality embroidery every time.

New brothread Tear Away Machine Embroidery Stabilizer Backing 8"x8" – 100 Precut Sheets – Medium Weight 1.8 oz- Fits 4×4 and 6×6 Hoops
▶TEMPORARY STABILIZER: It provides temporary support for embroidery projects. They are best used on firmly woven fabrics and…
As an affiliate, we earn on qualifying purchases.
As an affiliate, we earn on qualifying purchases.
Choosing Thread and Managing Tension for Better Results
Choosing the right thread quality makes a big difference in your embroidery results, ensuring durability and vibrant colors. You also need to learn tension adjustment techniques to keep stitches even and prevent puckering. Consistent thread tension is key to achieving professional-looking designs every time. Additionally, using high-quality embroidery thread can reduce thread breakage and improve the overall appearance of your work thread quality. Being mindful of your tension settings can help you troubleshoot issues early and maintain a smooth workflow during your embroidery projects. Proper tension control is essential for embroidery precision and achieving consistent stitch quality.
Thread Quality Selection
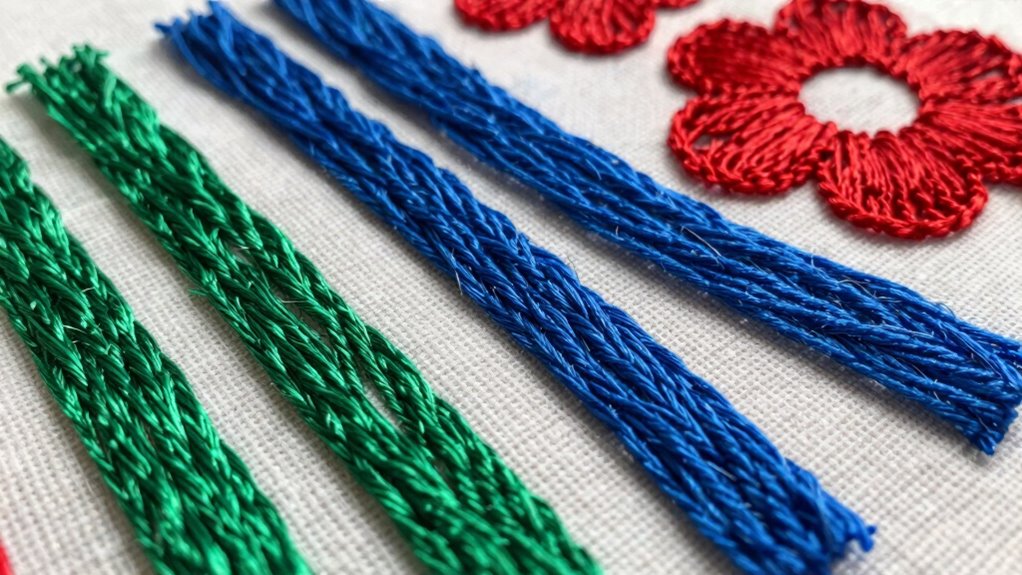
How can the right thread quality elevate your embroidery results? High-quality thread ensures vibrant thread color, consistent stitching, and fewer breakages. Choosing a reputable thread brand guarantees durability and smooth operation, reducing frustration. The thread quality directly impacts the overall look, especially in intricate designs. Poor quality thread can cause puckering or uneven tension, ruining your work. To improve results, select threads that match your project’s needs and consider how the thread color complements the fabric. Look for threads with tight plies and smooth finishes. Good thread quality also means less lint buildup and longer machine life. Remember, investing in quality thread helps your designs stitch beautifully and last longer, making every embroidery project more professional and satisfying.
- Enhanced thread color vibrancy
- Reduced thread breakage
- Better tension control
- Longer machine lifespan
- Consistent stitch quality
Tension Adjustment Techniques
Proper tension adjustment is essential for achieving smooth, professional embroidery results, especially when selecting the right thread. You need to fine-tune your machine’s tension settings to match the thread tension, ensuring the stitches are balanced and even. Start by threading your machine correctly and test on scrap fabric. If the stitches pull apart or look loose, tighten the tension; if they bunch or puck, loosen it. Adjust gradually, making small changes each time, and observe the effects. Remember, different threads require different tension adjustments, so always test before starting your project. Correct tension adjustment prevents puckering, skipped stitches, and thread breakage, resulting in a cleaner, more polished finish. Mastering this technique will appreciably improve your embroidery quality. Additionally, understanding thread compatibility is crucial for optimal results and avoiding common sewing issues.
Consistent Thread Tension
To achieve consistent thread tension, selecting the right thread type and managing it properly throughout your project are essential steps. Proper tension balance ensures your stitches are even and professional-looking, preventing puckering or loose areas. Maintaining thread consistency involves regularly checking your thread quality and re-threading when necessary. Adjust your machine’s tension settings to match the thread weight and fabric type, avoiding sudden changes mid-project. Use high-quality threads to reduce breakage and uneven stitches. Keep your thread spool unwound smoothly, avoiding tangles. Regularly test stitches on scrap fabric to fine-tune tension. Additionally, understanding the importance of sustainable thread options can help you choose environmentally friendly materials without compromising quality. Being aware of Free Floating techniques can also help in managing complex designs and maintaining tension across large or intricate embroidery projects. Properly monitoring thread tension throughout your work is crucial for achieving flawless results, especially when working with different fabrics and threads. Ensuring consistent tension helps maintain tension balance and guarantees your embroidery remains flawless from start to finish.
How Design Complexity and Density Influence Stitch Quality
When a design becomes more complex or densely stitched, it can substantially impact the overall stitch quality. High design complexity often involves intricate details and small elements that require precise stitching. If the stitch density is too high, stitches may become crowded, leading to puckering or stitches pulling apart. Conversely, low stitch density can cause gaps, making the design look sparse or unfinished. Balancing design complexity and stitch density is vital for ideal results. Too much complexity or density can strain your machine, increase thread buildup, and reduce durability. To avoid these issues, adjust the stitch density according to the design’s intricacy. Additionally, understanding embroidery tension adjustments can help optimize stitch quality and prevent common problems. Keeping these factors in check ensures your embroidery remains smooth, professional-looking, and durable.
Picking the Right Digitizing Software and Techniques

Choosing the right digitizing software is essential for creating high-quality embroidery designs that meet your specific needs. The best embroidery software will offer intuitive tools, precise control, and compatibility with your embroidery machine. When selecting software, consider features like automatic stitch generation, manual editing capabilities, and support for advanced digitizing techniques. Your choice of software influences how smoothly you can execute complex designs and guarantee ideal stitch quality. Additionally, implementing effective requirements traceability ensures that your design specifications are accurately maintained throughout the production process. Incorporating design validation tools can further help verify that your embroidery will stitch out correctly before production begins.
Common Digitizing Mistakes and How to Avoid Them
Even experienced digitizers can fall into common pitfalls that compromise the quality of embroidery designs. One mistake is neglecting proper thread color selection; choosing mismatched or overly shiny threads can make designs look unprofessional. Another frequent error is overlooking fabric choice, which affects stitch tension and fabric stability. Using the wrong fabric can cause puckering, skipped stitches, or uneven fills. Additionally, rushing through the digitizing process without thorough planning often results in dense or overly complicated designs that don’t stitch well. To avoid these issues, always match thread colors carefully to your design’s theme, and select fabric that suits the design’s complexity. Taking time to contemplate these factors ensures smoother stitching and a polished finished product.
Testing and Refining Your Embroidery Files Before Production
How can you guarantee your embroidery design turns out flawless before mass production? Testing and refining your files is vital. Start by stitching a sample on fabric similar to your final choice, paying attention to color matching to ensure hues look vibrant and accurate. Assess the design’s stability, adjusting stitch density if needed. Check for issues like puckering or thread breaks, refining the digitizing accordingly. Consider fabric selection carefully, as different fabrics can affect stitch quality. Use test runs to evaluate how the design performs under real conditions. Additionally, understanding the digitizing process helps identify potential problem areas early on. It’s also beneficial to analyze the fabric properties because different materials respond differently to various stitch techniques. Recognizing the importance of quality control measures throughout the testing phase ensures consistency and excellence. Finally, tweak trims, underlay, and stitch order to optimize the final look. These steps help prevent costly mistakes and ensure your design stitches beautifully every time. Incorporating urban pursuits and other regional influences can inspire unique design elements that resonate locally and enhance your overall project quality.
How to Find and Work With a Skilled Digitizer for Perfect Designs
Ensuring your embroidery designs turn out perfect starts with working with a skilled digitizer who can translate your ideas into precise, high-quality files. Start by researching digitizers with strong portfolios and positive reviews to guarantee quality embroidery design selection. When you find potential candidates, communicate clearly about your project’s details, including fabric type, thread colors, and desired stitch styles. Good digitizer communication skills are essential—they help you convey your vision and ensure they understand your expectations. Ask about their experience, turnaround times, and willingness to collaborate. A skilled digitizer will offer guidance on design adjustments and provide sample files for approval. Working closely with a talented professional guarantees your final embroidery design will stitch out beautifully and accurately. Properly formatted files are crucial for achieving consistent, high-quality embroidery results.
Frequently Asked Questions
How Do Different Fabrics Impact Embroidery Digitizing Choices?
Different fabrics considerably impact your embroidery digitizing choices because fabric stretch can cause designs to distort if not accounted for. You need to adjust thread tension accordingly; for stretchy fabrics, loosen tension to prevent puckering. Stiffer fabrics may require denser stitches for stability. By understanding fabric stretch and tweaking thread tension, you guarantee your design stitches out smoothly and looks professional, regardless of fabric type.
What Role Does Color Selection Play in Stitch Quality?
Color selection is the thread’s secret sauce, impacting stitch quality like spices in a recipe. When you choose colors with good color harmony, your design flows seamlessly, creating a polished look. Additionally, consider thread sheen—shiny threads catch the light beautifully, adding dimension and vibrancy. Using the right colors enhances the overall stitch quality, making your embroidery stand out with clarity and eye-catching appeal.
Can Beginner Digitizers Achieve Professional-Quality Embroidery Designs?
Yes, beginner digitizers can achieve professional-quality embroidery designs by learning essential techniques and practicing regularly. While digitizing challenges exist, mastering foundational skills like proper stitch placement and color selection helps improve your work. Focus on understanding fabric types, stitch types, and tension adjustments, and don’t rush the process. With patience and dedication, you’ll develop the skills needed to create polished, professional-looking designs over time.
How Does Machine Type Influence Design Digitization?
Your machine type directly influences design digitization because it determines machine compatibility with certain digitizing software. You need to select software compatible with your embroidery machine to guarantee smooth operation. Different machines have varying capabilities, so understanding your machine’s specifications helps you create designs that stitch beautifully. By choosing the right software and confirming compatibility, you’ll produce high-quality embroidery designs tailored to your machine’s features.
What Are the Signs of a Poorly Digitized Embroidery File?
You can spot a poorly digitized embroidery file by uneven stitching, excessive pull or puckering, and inconsistent thread tension. If the design’s complexity overwhelms your digitizing software, it may result in jagged edges or gaps. Look for these signs, especially when intricate details don’t stitch smoothly or layers bunch up. Good digitizing guarantees the design stitches out cleanly, regardless of complexity, giving you professional results every time.
Conclusion
Remember, a stitch in time saves nine. By understanding the basics of embroidery digitizing—from choosing the right stitches to testing your designs—you set yourself up for success. Pay attention to detail, avoid common mistakes, and don’t hesitate to work with skilled digitizers. With patience and practice, you’ll create beautiful, professional-looking designs that truly stitch out beautifully. Keep learning and refining, and your embroidery projects will always stand out.