To build a simple artwork photography setup in a small room, start by choosing a corner with enough space and organizing clutter using compact furniture. Use adjustable lighting like LED panels or softboxes at a 45-degree angle for even, natural-looking light, incorporating diffusers if needed. Make a DIY backdrop with fabric or painted cardboard, and stabilize your camera or smartphone on a tripod for sharp captures. Keep your composition clean and experiment with angles—if you keep exploring, you’ll discover even better results.
Key Takeaways
- Choose a compact, clutter-free corner with enough space for artwork, lighting, and camera setup.
- Use adjustable, energy-efficient lighting with diffusers to achieve even, natural-looking illumination.
- Select lightweight, easy-to-hang backgrounds like fabric or wallpaper for quick setup and removal.
- Mount your camera on a tripod, ensuring level positioning to capture straight, distortion-free images.
- Organize cords with cable management solutions to keep the small workspace safe and tidy.
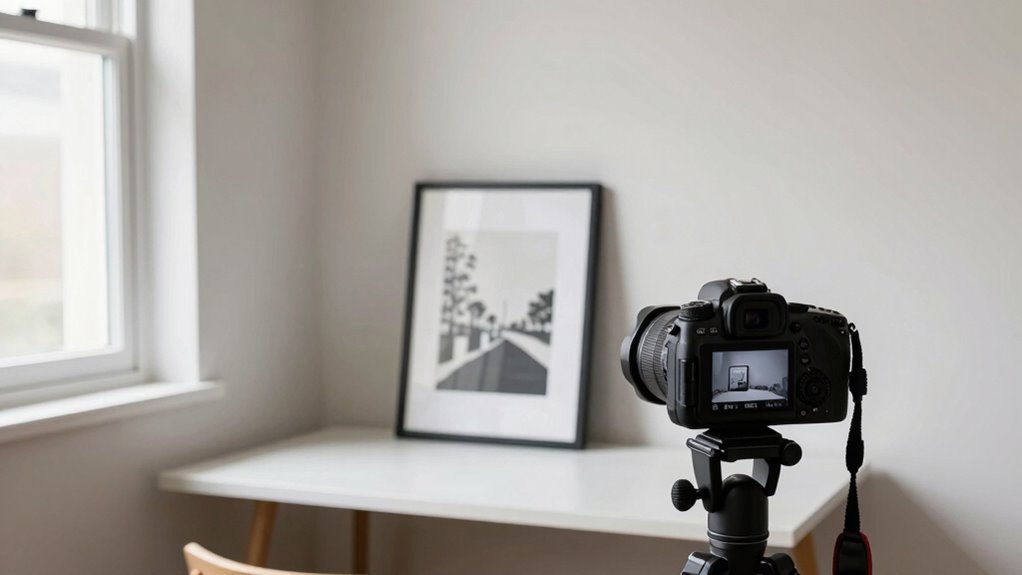
artwork photography tripod
As an affiliate, we earn on qualifying purchases.
As an affiliate, we earn on qualifying purchases.
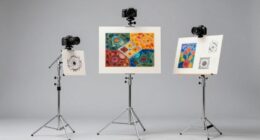
Assess Your Space and Create a Simple Art Photography Corner

Before setting up your art photography corner, it’s essential to evaluate your available space. You need to consider how to optimize space utilization to create an efficient, functional area. Look at the room’s layout and identify the best spot that offers enough room for your equipment and movement. Think about furniture arrangement; choose pieces that won’t clutter the space or block natural light. Keep your setup simple by selecting compact furniture or multi-purpose pieces. Clear away unnecessary items to maximize the area. Measure the space carefully to ensure your camera, tripod, and backdrop will fit comfortably. Planning your furniture arrangement carefully helps you avoid overcrowding, making your art photography corner more practical and easier to work in. Additionally, consider cabling solutions to keep cords organized and prevent tripping hazards in your small space. Incorporating top car protection options can also help safeguard your equipment when not in use. To further enhance your workspace, consider performance parts that can improve your overall efficiency and setup durability. Using space-saving furniture can optimize your limited area and make your setup more adaptable, while adding safety equipment can ensure a secure environment during your shoots.
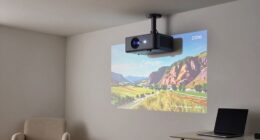
adjustable LED softbox lighting
As an affiliate, we earn on qualifying purchases.
As an affiliate, we earn on qualifying purchases.
Choose the Best Lighting for Artwork Photos in Small Rooms

Once you’ve arranged your workspace, focusing on lighting helps you capture artwork effectively in a small room. Use proper studio lighting to illuminate your artwork evenly, avoiding harsh shadows or glare. Opt for lights with adjustable color temperature to match the artwork’s true colors; a neutral 5000K to 5500K setting works well for accurate color reproduction. Position lights at a 45-degree angle to reduce reflections and ensure even coverage. Consider using diffusers or softboxes to soften the light, creating a natural look. Avoid relying solely on ambient room light, as it can be inconsistent. Understanding testing accuracy and selecting high-quality measurement tools can help you choose environmentally friendly and non-toxic lighting options. Additionally, choosing energy-efficient lighting can reduce energy consumption and lower your environmental impact. Proper lighting setup enhances the artwork’s details and colors, making your photos more vibrant and professional, even within limited space. Incorporating environmentally friendly lighting options can also contribute to a healthier indoor environment.
portable photography backdrop fabric
As an affiliate, we earn on qualifying purchases.
As an affiliate, we earn on qualifying purchases.
Pick Affordable Backgrounds and Easy Mounting Ideas
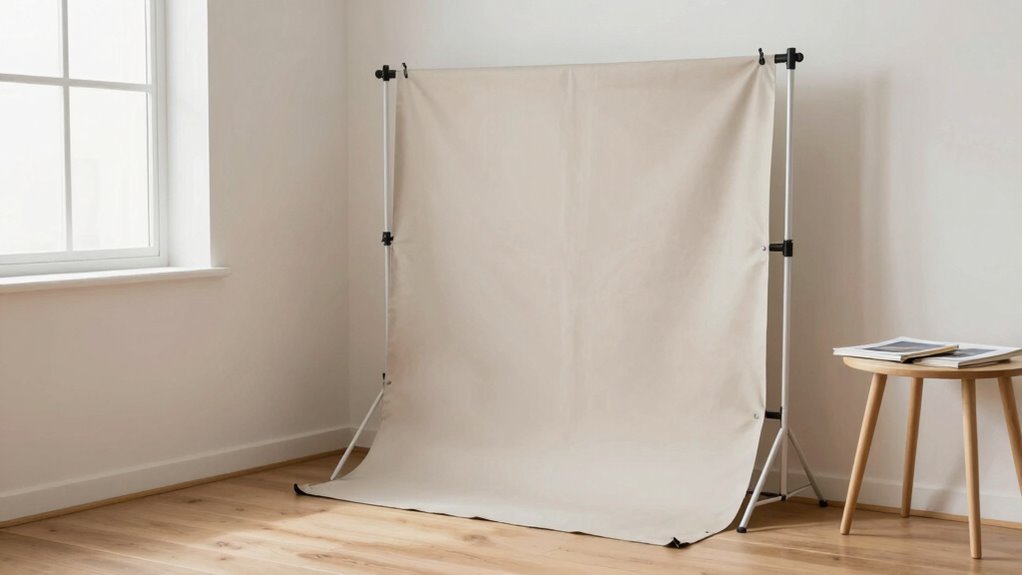
Choosing affordable backgrounds and simple mounting ideas doesn’t have to be complicated or expensive. You can find budget-friendly options like plain fabric, wallpaper samples, or painted cardboard that serve as effective affordable backdrops. These materials are easy to set up and switch out, giving you flexibility for different artworks. For added safety, ensure that any setup involving electrical equipment or lighting adheres to essential safety tips, minimizing risks in your small space. Incorporating printmaking paper choices that are lightweight and sustainable can also help reduce clutter and weight on your mounting surfaces. Additionally, selecting environmentally friendly materials supports sustainable practices in your creative space. To further enhance your setup, consider using versatile mounting methods that are adaptable to various surfaces and materials. For easy mounting ideas, use removable hooks, double-sided tape, or clamps to hang your backgrounds without damaging walls. Consider using a tension rod or a portable stand to hold backdrops in place. These solutions are inexpensive and quick to assemble, saving you space and time. Exploring cost-effective framing options can also help you achieve a polished look without overspending or cluttering your small room. With some creativity, you can create a clean, professional look without overspending or cluttering your small room.
cable management solutions for photography studio
As an affiliate, we earn on qualifying purchases.
As an affiliate, we earn on qualifying purchases.
Use Your Smartphone or Budget Camera to Capture Sharp Artwork Images

To get sharp artwork photos with your smartphone or budget camera, focus on using ideal lighting and stabilizing your device. Adjust your angle carefully to avoid glare and distortion, ensuring the artwork looks true to life. By paying attention to these points, you’ll capture clear, professional-looking images without extra equipment. Additionally, controlling the contrast ratio can help improve the depth and clarity of your photos. Understanding the brewing science behind light and color can also assist in optimizing your photography conditions for more accurate color reproduction. Recognizing how natural lighting interacts with your environment can further enhance the vibrancy and authenticity of your artwork images, especially when you understand the lighting setup that best suits small spaces. Being aware of how lighting conditions influence the final image can make a significant difference in achieving high-quality results.
Optimal Lighting Techniques
Good lighting is essential for capturing sharp, detailed artwork images with your smartphone or budget camera. To achieve this, set up your studio with creative lighting that minimizes shadows and glare. Use natural light when possible by positioning your artwork near a window, but avoid direct sunlight that can cause harsh contrasts. If you use artificial lighting, opt for soft, diffused sources like LED panels or lamps with diffusers. Position the lights at a 45-degree angle to evenly illuminate the artwork, reducing reflections and shadows. Keep the studio setup simple; avoid clutter that can interfere with light distribution. Proper lighting not only enhances details and colors but also ensures your images stay crisp and vibrant.
Stabilizing Your Device
Stabilizing your device is key to capturing clear, detailed artwork images. To achieve sharp photos, focus on tripod stability or effective handheld techniques. Using a tripod minimizes shake and ensures consistent framing, especially in low light. If a tripod isn’t available, stabilize your device by bracing your elbows against your body or a sturdy surface. Keep your hands steady and press the shutter gently to avoid movement. Here’s a quick comparison:
| Technique | Benefits |
|---|---|
| Tripod stability | Maximum stability, sharp details |
| Handheld techniques | Portable, quick adjustments |
| Using a surface | Adds extra support |
In addition, understanding camera stabilization methods can help improve your photography results. Choosing the right stabilization technique based on your lighting conditions can significantly enhance image clarity and reduce blur. Select the method that best suits your setup and lighting conditions for the sharpest, most professional-looking artwork photos.
Choosing the Right Angle
Choosing the right angle is essential for capturing artwork sharply and accurately, especially when using your smartphone or budget camera. Your artwork perspective can dramatically affect how the image appears, so experiment with different camera angles to find the most flattering view. Keep the camera level and perpendicular to the artwork to avoid distortion. A straight-on shot often provides the most true-to-life representation, but slight tilts can add interest if done intentionally. Avoid shooting from too high or low angles, which can distort proportions. Think about how light and shadows fall on the artwork from your chosen camera angle, as this impacts the overall clarity. By carefully selecting your camera angle, you ensure your artwork’s details are sharp, vibrant, and true to its original appearance.
Tips to Improve Composition and Camera Settings for Better Photos
To get the best photos of artwork, focus on optimizing your composition by arranging elements thoughtfully and using techniques like the rule of thirds. Adjust your camera settings to match lighting conditions and reduce blur, ensuring sharp images. Don’t forget to experiment with natural and artificial light to highlight details and create the right mood.
Optimize Composition Techniques
Improving your artwork photos starts with mastering composition techniques that draw viewers in and highlight your subject. Focus on establishing strong focal points that immediately attract attention. Position your artwork so the viewer’s eye naturally lands there first. Use leading lines, such as edges of furniture or shadows, to guide the viewer’s gaze toward the focal point, creating depth and interest. Keep the background simple to avoid distractions and enhance the artwork’s prominence. Experiment with framing your piece using the rule of thirds or centered compositions to find what best showcases your work. Remember, intentional placement of elements directs attention and creates balance. By refining your use of focal points and leading lines, you’ll produce more engaging, professional-looking photos that truly showcase your artwork.
Adjust Camera Settings Properly
Adjusting your camera settings correctly is essential for capturing artwork photos that are sharp, well-exposed, and true to color. Start by setting your aperture to control depth of field; a smaller f-number (like f/2.8) blurs the background, highlighting the artwork, while a higher f-number (f/8 or more) keeps more of the piece in focus. Next, adjust your ISO to match your lighting conditions—use the lowest ISO possible to minimize grain, increasing it only if your room is dim. Proper ISO adjustment ensures your photos stay clear without noise. Check your camera’s exposure settings, and use a tripod if needed to stabilize your shot. Correctly managing aperture and ISO helps produce crisp, vibrant artwork images with accurate color reproduction.
Use Natural and Artificial Light
Lighting plays a key role in capturing artwork that looks vibrant and true to life. Using both natural and artificial light helps you achieve the right balance for a gallery display or artistic inspiration. Natural light, like indirect sunlight, highlights colors and textures without harsh shadows. Position your artwork near a window, but avoid direct sun to prevent glare. Supplement with soft artificial lighting, such as LED bulbs or diffused lamps, to fill in shadows and maintain consistent illumination. Adjust the light angles to minimize reflections and enhance details. Combining these light sources allows you to control brightness and color accuracy, ensuring your photos showcase the artwork’s true essence. Proper lighting makes your images stand out and captures the artistic intent behind each piece.
Edit Your Photos to Bring Out Artwork Details and Colors

To truly make your artwork stand out in photos, you need to enhance the details and colors during editing. Focus on color correction to guarantee the hues match the original piece’s vibrancy and mood. Next, use detail enhancement techniques to sharpen textures and fine lines, making every element pop. Here are three key tips to evoke emotion through editing:
Enhance your artwork by sharpening details and perfecting color vibrancy to evoke stronger emotions.
- Adjust saturation and contrast to amplify the artwork’s visual impact.
- Use selective editing to highlight specific details or colors that tell a story.
- Remove distracting elements or imperfections to keep the viewer’s attention on your masterpiece.
Frequently Asked Questions
How Can I Prevent Glare or Reflections on Shiny Artwork?
To prevent glare or reflections on shiny artwork, start by using matte finishes whenever possible, as they reduce light reflections. If the artwork has a glossy surface, apply anti-reflective coatings or use a polarizing filter on your camera lens. Position your lighting at angles that minimize direct reflections, and shoot in diffused light to further lessen glare, ensuring your artwork’s details remain clear and vibrant.
What Are the Best Portable Lighting Options for Small Spaces?
Your small space needs superhero lighting! Opt for portable LED panels that unfold like magic, offering powerful, adjustable illumination without taking up much room. Ring lights are your compact champions, providing even, shadow-free light that highlights artwork beautifully. Both are lightweight, easy to set up, and perfect for tight spots. With these options, you’ll achieve professional-quality photos without sacrificing space or convenience—your artwork will shine brighter than ever!
How Do I Choose the Right Camera Settings for Different Artwork Types?
You choose the right camera settings by adjusting the aperture and shutter speed based on your artwork. Use a smaller aperture (higher f-stop number) for detailed pieces to keep everything in focus, and a larger aperture (lower f-stop) for softer backgrounds. Set a shutter speed fast enough to prevent blur, typically around 1/125 or faster, especially if you’re hand-holding your camera. Experiment to find the perfect balance for each artwork type.
What Are Cost-Effective Ways to Improve Background Quality?
To improve background quality affordably, start with affordable backdrops like plain paper or fabric, which are easy to swap out and clean. You can also DIY lighting using household lamps and reflectors made from white foam board or aluminum foil to soften shadows and create even illumination. These simple, cost-effective solutions help your artwork stand out without breaking the bank, ensuring professional-looking photos in your small space.
How Can I Store or Display My Photos After Shooting?
A picture is worth a thousand words, so choose your storage solutions and display methods wisely. You can organize your photos in digital folders, backing them up on external drives or cloud services for safekeeping. For display, consider framing your best shots or creating a rotating gallery on a wall. Keep your work accessible and protected, turning your space into a personal gallery that showcases your artistic journey.
Conclusion
With just a small corner and a few simple tools, you can create artwork photos that rival gallery masterpieces. Imagine capturing every vibrant detail and stunning color with ease, turning your tiny space into a professional studio. Don’t let limited room hold you back—your creativity and a little setup magic can produce images that blow minds and leave viewers in awe. Get ready to showcase your artwork in a way that’s truly breathtaking!