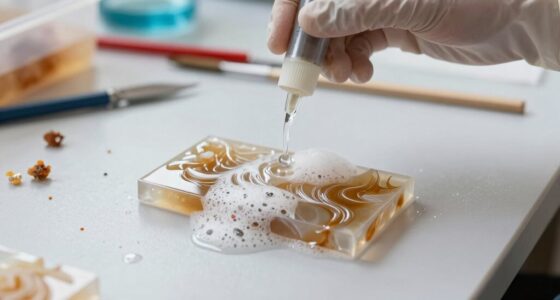

Metal casting for artists involves several clear stages that you can easily follow. First, you create a design and make a pattern, then build a mold around it. Next, you pour molten metal into the mold carefully, allow it to cool, and finally, remove the mold to reveal your cast piece. Finishing touches like cleaning and polishing help perfect your work. Keep exploring these steps to turn your ideas into stunning metal creations.
Key Takeaways
- Start with detailed sketches and clear planning to guide the casting process effectively.
- Choose the appropriate casting method and materials based on your design complexity and desired detail.
- Create a precise pattern and build a sturdy, heat-resistant mold with proper venting for smooth casting.
- Pour molten metal steadily, ensuring safety, and allow sufficient cooling before mold removal.
- Finish by polishing and inspecting the piece, maintaining safety throughout the process for optimal results.
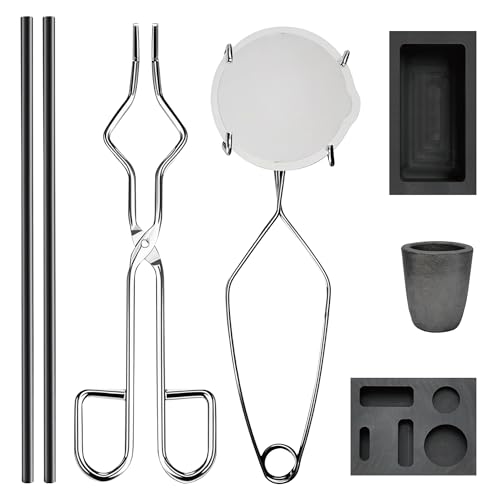
Nelyrho 8-in-1 Metal Casting Kit – Graphite Crucible, Graphite Ingot Molds, 2 Stir Rods, Quartz Cup & Tongs – Complete Set for Melting Gold, Silver, Aluminum, Brass
All-in-One Crucible Kit for Gold Refining – This 8-in-1 set is your complete solution for refining gold and…
As an affiliate, we earn on qualifying purchases.
As an affiliate, we earn on qualifying purchases.
What Is Metal Casting and Why Is It Great for Artists
Have you ever wondered how artists transform molten metal into detailed sculptures and jewelry? Metal casting is a versatile process that allows you to create complex shapes using a variety of metal alloys. At a casting workshop, you can learn to melt and pour these alloys into molds, capturing intricate details with precision. This technique opens up endless creative possibilities, from small jewelry pieces to large art installations. Casting is ideal for artists because it offers control over the final product’s form and texture. Plus, working with different alloys gives you options for strength, color, and finish. Understanding metal alloy composition and how it affects casting results can help you make better material choices for your projects. Additionally, exploring casting techniques can improve your craftsmanship and expand your artistic repertoire. Developing a good understanding of material properties can also enhance your casting outcomes. Furthermore, learning about thermal properties of metals can optimize your casting process and prevent common issues. For example, knowing the cooling rates of different alloys can help prevent defects such as cracks or warping. Whether you’re a beginner or experienced artist, mastering metal casting can elevate your work and expand your artistic expression.

Prestige ORO 5Lb Premium Jewelry Making Casting Powder Lost Wax Investment Powder for Gold, Silver ETC
manufacturer: Certus
As an affiliate, we earn on qualifying purchases.
As an affiliate, we earn on qualifying purchases.
How to Choose the Best Metal Casting Method for Your Art
Choosing the right metal casting method depends on your artistic goals, the complexity of your design, and the materials you’re working with. For simple, small pieces, investment casting or lost-wax casting offers fine detail, while sand casting suits larger, rougher forms. Consider casting equipment options—such as crucibles, molds, and burnout setups—that match your chosen method and workspace. If you’re aiming for intricate designs and fine finishes, methods like precision casting may be best. For more straightforward projects, simpler equipment and quick setups work well. Matching your project needs with the right alloy and equipment guarantees a smoother casting process and better final results. Additionally, understanding the casting process stages can help you plan and execute your project more effectively. Knowing about metal alloy properties can also influence your choice, ensuring compatibility with your selected casting technique and desired outcome. Evaluating the available casting techniques helps tailor your approach to specific artistic and technical requirements. Moreover, selecting the appropriate casting equipment can significantly impact the quality and efficiency of your work. Being aware of metal melting points allows for safer handling and better process control during casting.

jojofuny 2pcs Skull Head Graphite Casting Ingot Molds, High-Density Metal Smelting Mold for Gold, Silver, Copper, DIY Jewelry Making, Artistic Creations, 2.36 x 1.96 x 0.39 Inch, Black
Unique Skull Shape Design: Featuring a distinctive skull head form, this graphite casting mold adds flair to artistic…
As an affiliate, we earn on qualifying purchases.
As an affiliate, we earn on qualifying purchases.
Getting Your Design Ready for Casting : Tips for Success
To get your design ready for casting, start by sketching a clear and detailed plan so the process goes smoothly. Choose materials that suit your project and consider how they will perform during casting. Also, plan for proper venting to prevent air bubbles and make certain of a quality final piece. Additionally, understanding the different types of cold medications can help you manage any health concerns during your project. Being aware of the popularity of pinball machines can inspire creative designs and themes for your artwork.
Sketch Clear and Detailed
Ever wondered how a well-detailed sketch can make or break your casting process? Clear, precise drawings are essential for translating your vision into a successful metal sculpture or jewelry design. Focus on capturing every detail, from proportions to textures, so your mold accurately reflects your intent. Use clean lines and include notes on important features like surface finishes or specific angles. This detailed preparation can prevent mistakes and streamline the entire process. It helps prevent misunderstandings or errors during casting, saving you time and materials. Additionally, understanding the stain removal techniques for your materials can ensure your finished piece remains pristine and visually appealing. Incorporating knowledge about wood movement can also help you anticipate how your casting might change over time. A detailed sketch acts as your blueprint, guiding you through each step confidently. Whether you’re sculpting a large piece or crafting tiny jewelry components, clarity in your design minimizes surprises later. Remember, the more detailed your initial drawing, the smoother the progression to the casting stage. Exploring adaptive lighting techniques can also assist in visualizing your design’s fine details more accurately during the planning phase. Furthermore, being aware of material behavior under different conditions can help you choose the best materials for your project.
Choose Suitable Materials
Choosing the appropriate materials is essential to guarantee your design translates well into a finished metal piece. Selecting the right metal alloy ensures your sculpture has the desired aesthetic and structural qualities. Consider material durability, especially if your piece will be exposed to the elements or frequent handling. Some alloys, like bronze or brass, offer excellent durability and workability, making them popular choices for artists. Think about the casting process you’ll use and how different alloys respond to heat and molding. Using the correct material from the start reduces the risk of defects, cracks, or warping later on. Additionally, understanding latest fashion trends can inspire innovative design choices and help you create unique pieces that resonate with current styles. Being aware of metal properties can further assist in selecting the most appropriate material for your specific project needs. Incorporating knowledge of material compatibility can also prevent issues during the casting process and improve the overall quality of your sculpture. Considering thermal expansion is also important to ensure your piece maintains its integrity over time and under varying temperature conditions. Moreover, understanding casting techniques can help you choose materials that are compatible with your preferred method and achieve the best results.
Plan for Proper Venting
Proper venting is a key step in preparing your design for successful casting. Effective venting techniques ensure that air and gases can escape from the mold, preventing defects and cracks. When planning your mold design, include small, strategically placed vents that allow for the smooth flow of gases without compromising the integrity of the casting. Use thin channels or vents that connect to the main cavity, making sure they’re easy to access and clean. Proper venting not only improves the quality of your final piece but also reduces the risk of trapped air causing imperfections. Take time to contemplate vent placement during the initial stages of mold design, as this will save you time and effort later in the casting process. Additionally, understanding the seasons for casting can help optimize the process by controlling temperature and humidity conditions, leading to better results.

Reversible Wire Plate Ingot Mold Reversible Jewelry Ingot Mold Precious Metal Casting Melting with 4 Hole Sizes for Melting Casting Refining Gold Silver Copper Aluminum Brass Precious Metals
The reversible design of our mold can be used for making round/half round bar/wires,which allows you to create…
As an affiliate, we earn on qualifying purchases.
As an affiliate, we earn on qualifying purchases.
Creating Your First Pattern or Model for Metal Casting
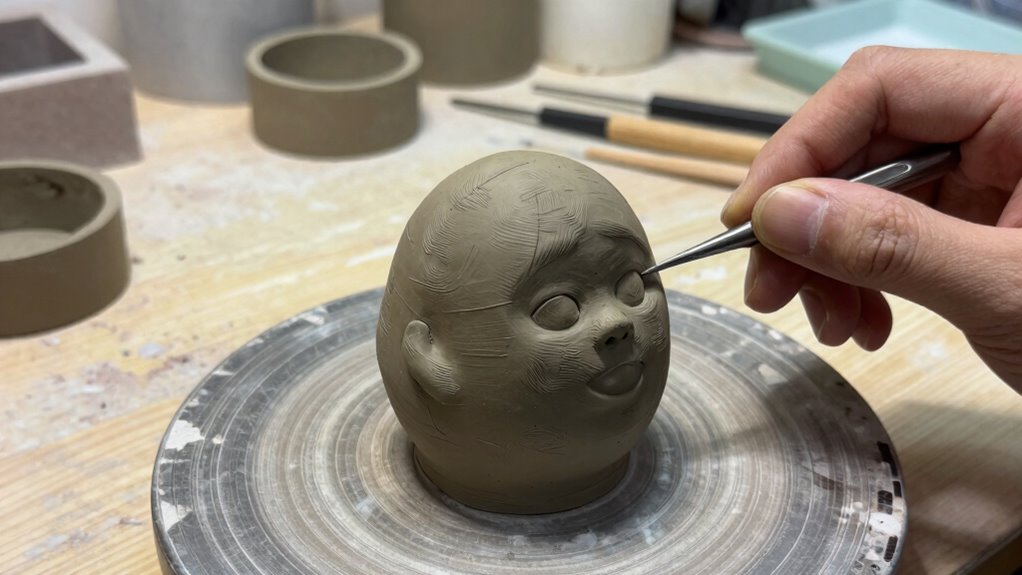
To create your first pattern or model for metal casting, start by deciding on the design you want to reproduce in metal. This is the foundation of your pattern creation. Focus on how the pattern will fit into the mold design, considering details and dimensions.
Here are four key steps to inspire your confidence:
- Visualize your final piece and sketch it out clearly.
- Select suitable materials for your pattern based on complexity.
- Shape your pattern carefully, ensuring smooth surfaces.
- Test fit and refine your pattern until it matches your vision.
Making a Simple, Safe Mold for Beginners

To make a simple, safe mold, start by choosing the right materials that are easy to work with and safe to handle. Next, build a sturdy mold frame to hold everything securely during pouring. Finally, focus on pouring the metal carefully and finishing the mold smoothly to guarantee a good cast and secure process.
Selecting Appropriate Materials
Choosing the right materials is essential for creating a simple, safe mold, especially for beginners. Your goal is to select a material with reliable durability and appropriate for your metal alloy choice. The right choice will guarantee your mold withstands repeated use without breaking or warping.
Consider these key points:
- Safety First: Use non-toxic, heat-resistant materials to avoid hazards.
- Material Durability: Pick materials that can endure the high temperatures and repeated casting cycles.
- Compatibility: Ensure your mold material works well with your selected metal alloy, preventing unwanted reactions.
- Ease of Use: Choose materials that are easy to work with, so you can focus on your art without frustration.
These choices will make your casting process smoother, safer, and more rewarding.
Building the Mold Frame
Building the mold frame is a crucial step in creating a safe and effective casting. A sturdy casting frame ensures your mold stays intact during pouring and handling. Choose materials like wood or metal for your mold frame, depending on the size and complexity of your project. Measure carefully and assemble the frame tightly to prevent leaks or shifts. Remember, a well-built mold frame supports your casting process from start to finish.
| Stability | Material Choice | Safety Tips |
|---|---|---|
| Prevents leaks | Wood or metal | Wear gloves |
| Maintains shape | Durable, non-reactive | Use clamps securely |
| Ensures safety | Properly assembled | Ventilate workspace |
| Supports pouring | Adjustable if needed | Handle with care |
| Promotes quality | Rigid structure | Keep workspace organized |
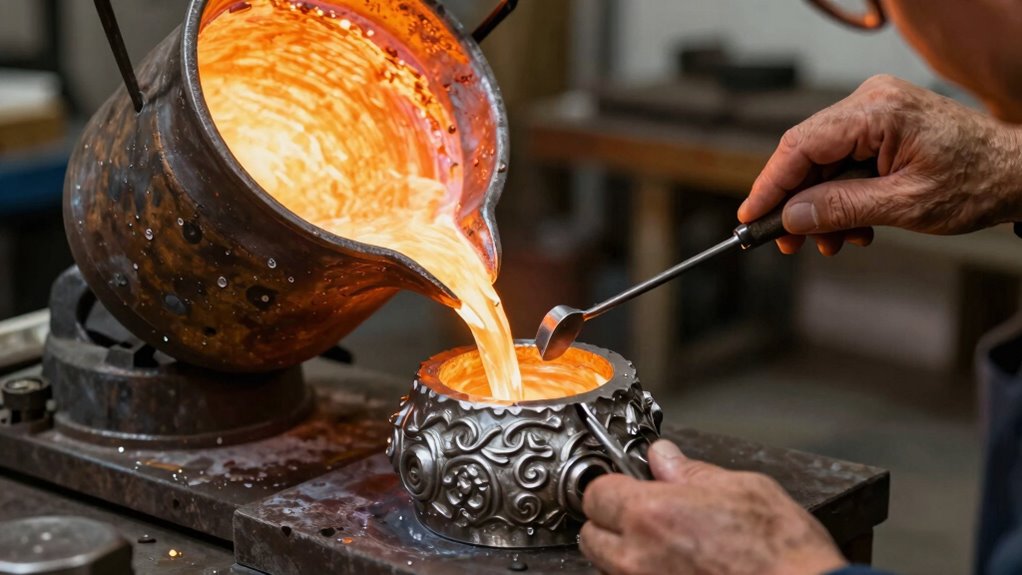
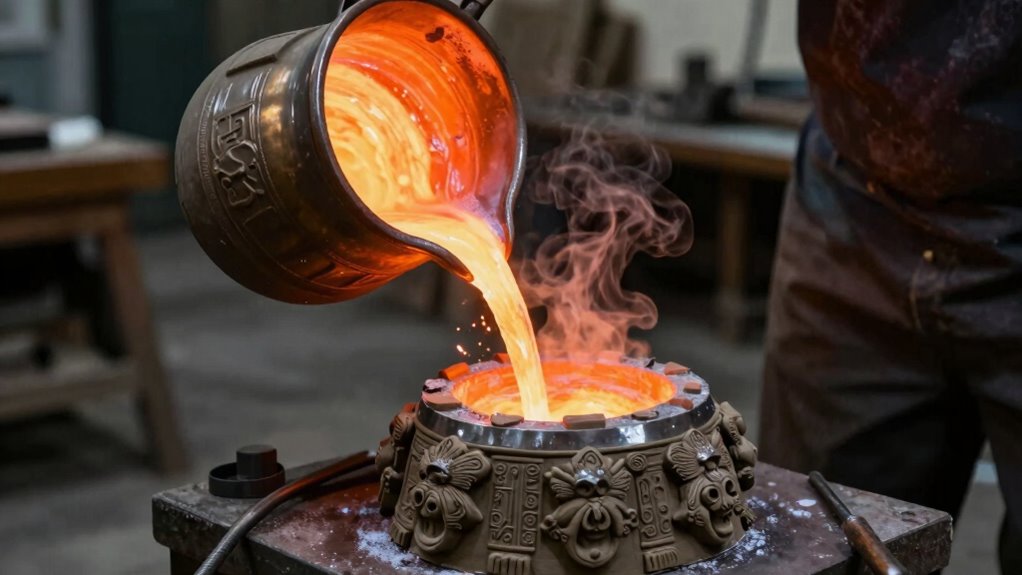
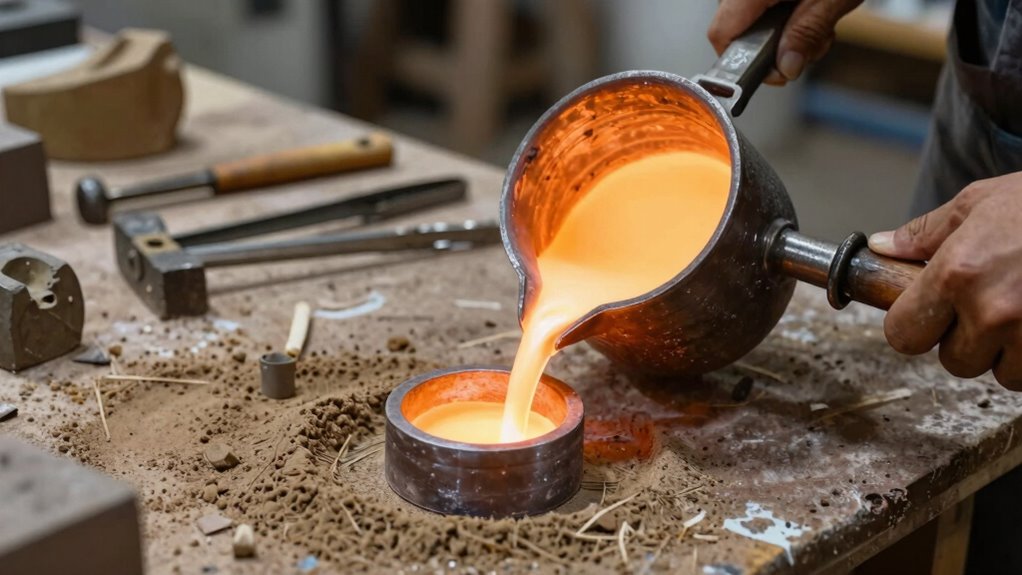
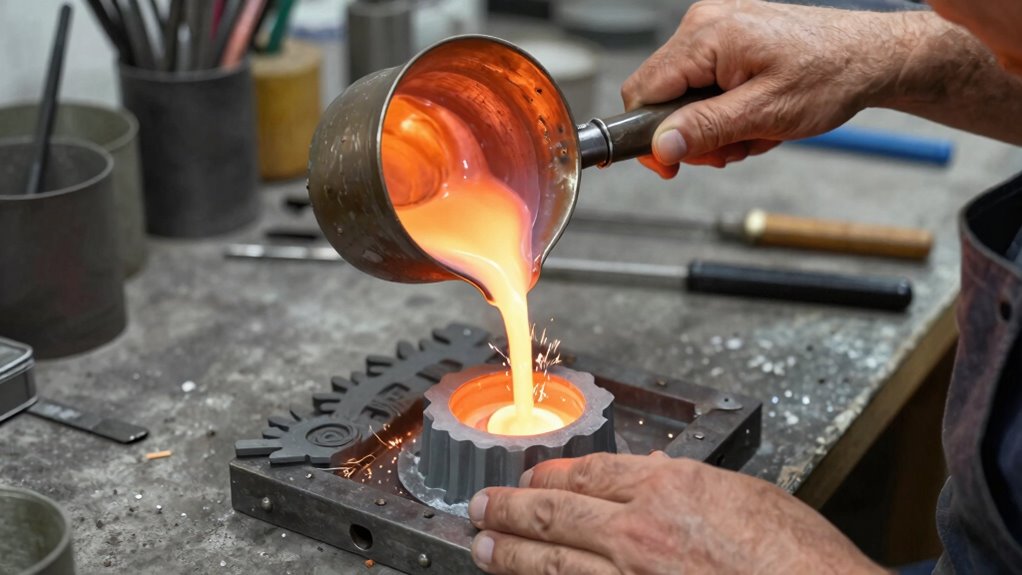
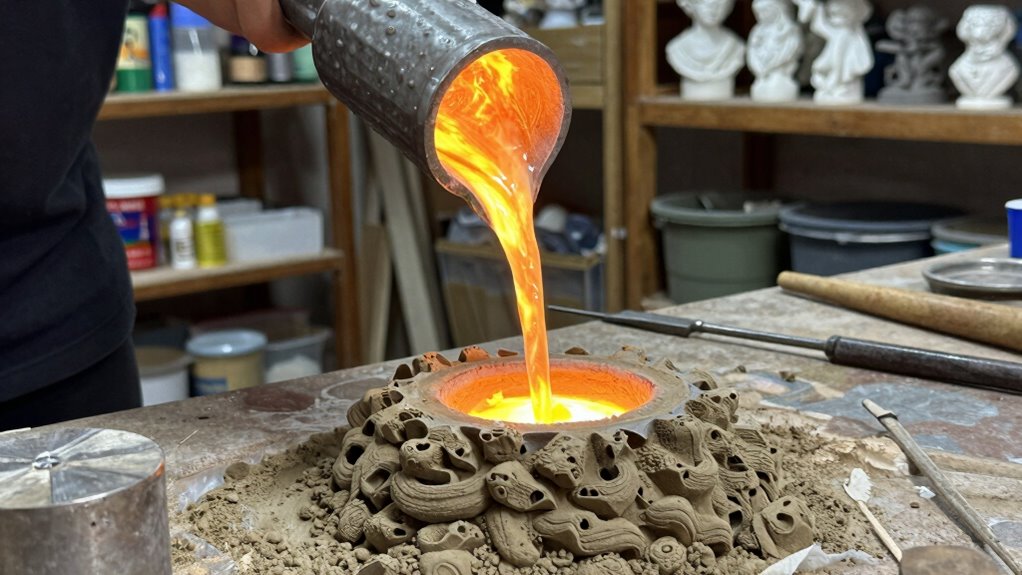
Pouring and Finishing
Once your mold frame is secure, pouring the molten metal becomes the next critical step. Take a deep breath and carefully pour the metal into your mold, watching it flow steadily. This moment can be exhilarating! After pouring, focus on mold maintenance: let it cool completely before removing the mold to prevent damage. Once cooled, gently break away the mold, revealing your sculpture. To finish, smooth the surface with metal polishing to bring out a brilliant shine. Remember, proper mold maintenance guarantees longevity and quality for future projects. Here are key steps to keep in mind:
- Pour steadily and confidently
- Allow sufficient cooling time
- Carefully remove the mold
- Polish the finished piece for a professional look
These steps make the process safe and rewarding.
How to Pour Metal Smoothly and Safely

Pouring metal smoothly and safely requires careful preparation and steady technique. First, ensure you follow proper metal safety procedures, including wearing protective gear and working in a well-ventilated area. Before pouring, double-check your casting techniques, such as preheating molds and controlling pour speed. Keep your hands steady and pour slowly along the mold’s highest point to prevent air pockets and splashing. Maintain a consistent flow to avoid turbulence, which can cause defects. Always keep a fire extinguisher nearby and stay alert for any signs of overheating or spills. Practicing these steps minimizes risks and results in a clean, smooth casting. Remember, patience and precision are key to a successful, safe pouring process every time.
Cooling and Removing Your Cast Without Stress
Cooling your cast properly is essential to prevent cracks and warping, so it’s important to let it sit undisturbed and at a controlled rate. Proper metal cooling guarantees your sculpture maintains its shape and integrity. Once cooled, mold removal becomes easier and safer. To achieve this:
- Allow sufficient time for the metal to cool completely before moving.
- Avoid rapid cooling to prevent stress fractures.
- Gently tap or loosen the mold edges to ease removal.
- Carefully lift the mold, supporting your cast without forcing it.
Taking your time during this stage reduces stress on your piece and minimizes damage. Patience in cooling and mold removal ensures your final sculpture is as flawless and durable as possible.
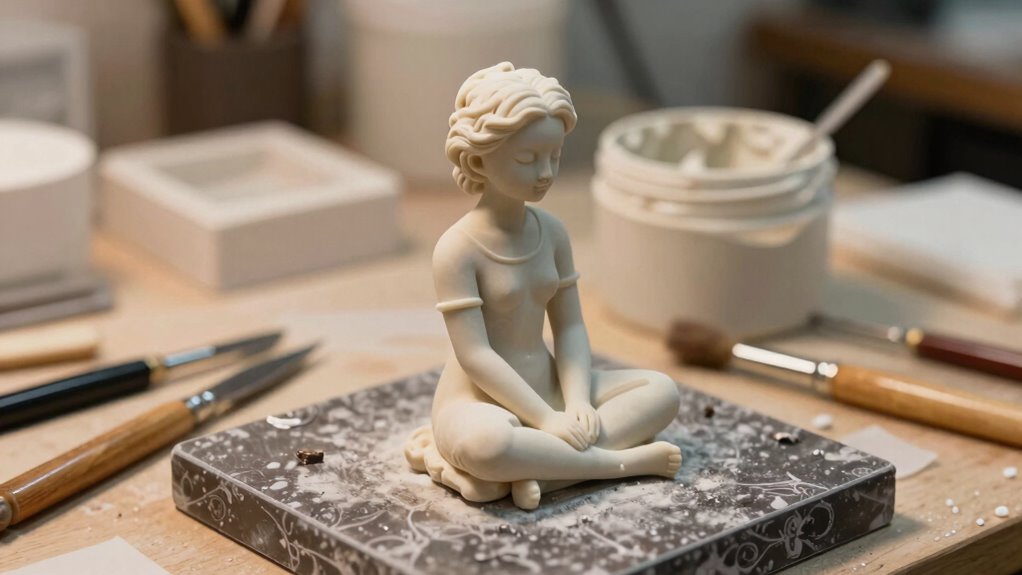
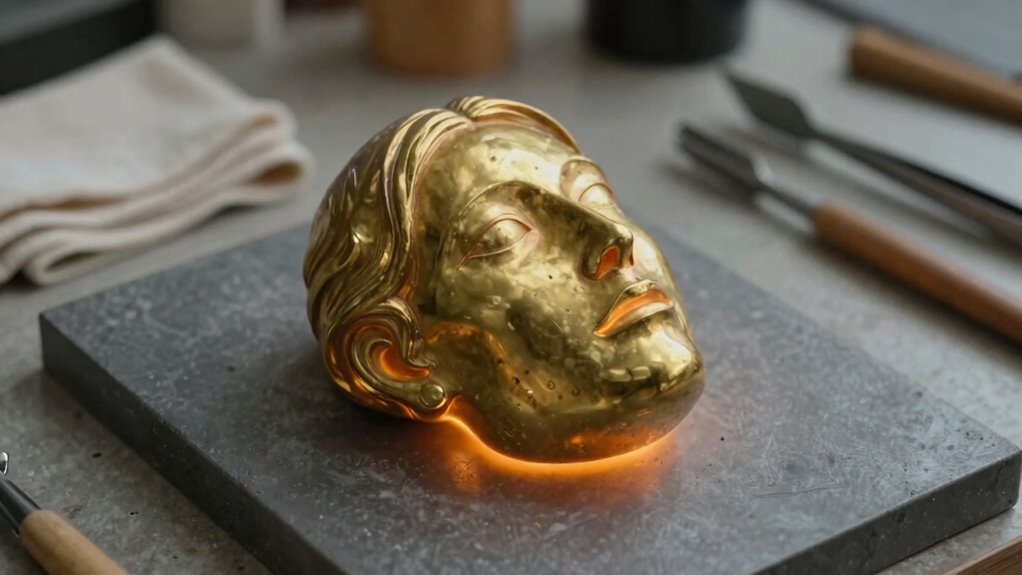
Finishing Your Metal Cast: Cleaning, Polishing, and Adding Details
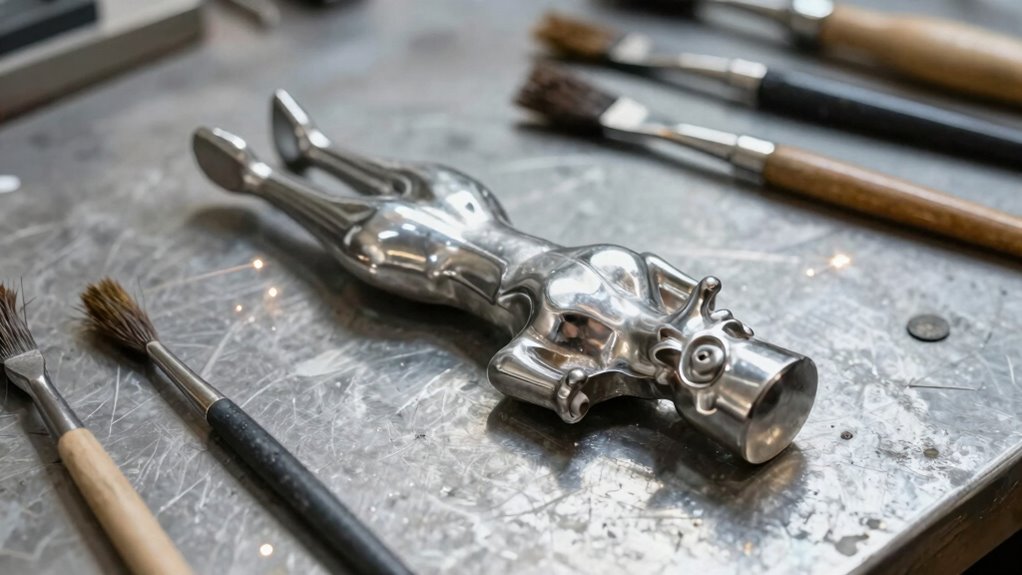
After your cast has cooled and been removed from the mold, the next step is to clean and refine it to enhance its appearance and durability. Start by removing any excess sprues or gates with file or wire cutters. Use gentle cleaning techniques like brushing or tumbling to eliminate surface residues. When polishing, experiment with different polishing techniques—such as buffing with a cloth wheel or applying polishing compounds—to achieve a smooth, shiny surface. Adding textures can give your piece a unique character; use tools like chisels or abrasives to carve patterns or surface details. Take your time to refine these details, ensuring they complement your overall design. Proper finishing elevates your metal piece, making it ready to display or further embellish.
Common Mistakes Beginners Should Avoid in Metal Casting
When starting out in metal casting, skipping proper planning can lead to costly mistakes or failed projects. Ignoring material compatibility might cause unwanted reactions or weak spots in your work. Don’t forget safety precautions—neglecting them can result in serious injuries or accidents.
Skipping Proper Planning
Have you ever started a metal casting project without a clear plan? It’s a common mistake that leads to frustration and wasted materials. Ignoring proper planning causes several issues:
- Rushing into the process without understanding the steps increases the risk of planning pitfalls.
- Overlooking details like mold design or material properties can ruin your project before it begins.
- Missing essential safety measures puts you at unnecessary risk.
- Failing to prepare your workspace means delays and added stress.
Ignoring Material Compatibility
Ignoring material compatibility is a common mistake that can ruin your metal casting project before it even starts. When you overlook the importance of matching materials, you risk material mismatch and alloy issues that can cause cracks, porosity, or failure. Always check if your chosen metal and mold materials are compatible. Using incompatible alloys may lead to unexpected reactions or weakened castings. Here’s a quick guide:
| Material Type | Compatible Molds | Common Alloy Issues |
|---|---|---|
| Metals | Graphite, ceramic | Cracking, impurity |
| Alloys | Steel, bronze | Mismatch expansion |
| Molds | Investment, sand | Erosion, fusion |
Pay attention to these factors to ensure a smooth casting process. Proper material compatibility prevents costly mistakes and guarantees better results.
Overlooking Safety Precautions
Neglecting safety precautions can turn a rewarding metal casting project into a dangerous situation. Without proper protective gear, you risk burns, fumes, or eye injuries. Always identify and respect safety zones—keep a clear area around your work to prevent accidents. Here are common mistakes to avoid:
- Skipping protective gear like gloves, goggles, and respirators.
- Ignoring the importance of designated safety zones around molten metal.
- Rushing through steps without evaluating potential hazards.
- Neglecting proper ventilation to avoid inhaling harmful fumes.
Next Steps: Resources and Ideas to Grow Your Casting Skills
To expand your casting skills, exploring a variety of resources and ideas can make a significant difference. Start by studying different metal sculpture techniques through books, online tutorials, and workshops. Visiting art schools or casting studios provides hands-on experience with casting tools and methods. Join artist communities or forums to exchange tips, showcase your work, and get feedback. Attending exhibitions or demonstrations introduces new ideas and inspires experimentation. Consider taking specialized classes focused on specific casting processes like lost-wax or sand casting. Keep a journal of your progress and challenges to track growth. Remember, practicing regularly and seeking mentorship or peer advice accelerates skill development. With dedication and the right resources, you’ll refine your craft and create more intricate, compelling metal sculptures.
Frequently Asked Questions
What Safety Equipment Is Essential During Metal Casting?
You need protective gear like heat-resistant gloves, safety goggles, and a long-sleeved apron to stay safe during metal casting. Following safety protocols is essential to prevent burns and injuries from hot metal splashes and fumes. Make certain your workspace has proper ventilation and keep a fire extinguisher nearby. Wearing the right protective gear and adhering to safety protocols help you work confidently while minimizing risks in this process.
How Long Does Each Stage of the Casting Process Typically Take?
Think of the casting process as a carefully choreographed dance. The initial stage, mold making, usually takes a few hours to a day, depending on complexity. Pouring the metal flows swiftly, often just minutes, like a rushing river. Cooling can range from several hours to days, depending on size. Finishing touches might take hours to days, but overall, each step’s timing estimates help you plan your artistic symphony efficiently.
Can I Cast Multiple Copies From a Single Mold?
Yes, you can cast multiple copies from a single mold, but it depends on mold durability and casting accuracy. If your mold is made from a durable material like silicone or plaster, you can produce several casts before it degrades. Keep in mind that as you make more copies, casting accuracy might decrease slightly. To maximize quality, monitor the mold’s condition and replace it when necessary.
What Types of Metals Are Best for Beginner Artists?
You’ll find that beginner-friendly metals like aluminum and pewter are perfect choices, with aluminum making up about 8% of the world’s metal production. When selecting your metal alloy, opt for soft, low-melting options that are easier to work with. These metals are forgiving, allowing you to learn casting techniques without the intimidation of high temperatures or complex setups, making your artistic journey smoother and more enjoyable.
How Do I Troubleshoot Common Casting Defects?
To troubleshoot common casting defects, start by reviewing your alloy selection to make certain the metal’s compatibility and melting point. Check your mold design for proper venting and smooth surfaces, as poor design can cause defects like porosity or incomplete fills. Adjust your pouring temperature if you notice cold shuts or misruns. Properly cleaning and preheating molds also helps prevent defects, ensuring a smoother, more successful casting process.
Conclusion
Now that you know the steps, you’re ready to turn your creative visions into stunning metal masterpieces. With patience and practice, you’ll master the art of casting—no small feat, but absolutely achievable. Remember, every cast is a new adventure, and soon you’ll be crafting pieces that could outshine even the brightest stars. So plunge in with confidence—your journey to becoming a metal casting pro starts right here!