
To capture moving light trails like a pro, you’ll need to set your camera to a long exposure, using a tripod to keep the shot steady. Experiment with different light sources, such as flashlights or glow sticks, and move them creatively in the frame. Adjust your shutter speed, aperture, and ISO to fine-tune the effects. With patience and practice, you’ll master the techniques and create stunning images—keep exploring to learn even more about this artful craft.
Key Takeaways
- Use a sturdy tripod and a slow shutter speed to effectively capture moving light trails.
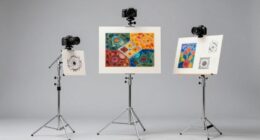
- Experiment with different light sources like flashlights, glow sticks, or sparklers for varied effects.
- Adjust camera settings such as aperture and ISO to control exposure and enhance trail brightness.
- Plan your movements and drawings in advance to create intentional, pro-level light patterns.
- Practice patience and multiple shots to refine techniques and achieve smooth, dynamic light trails.

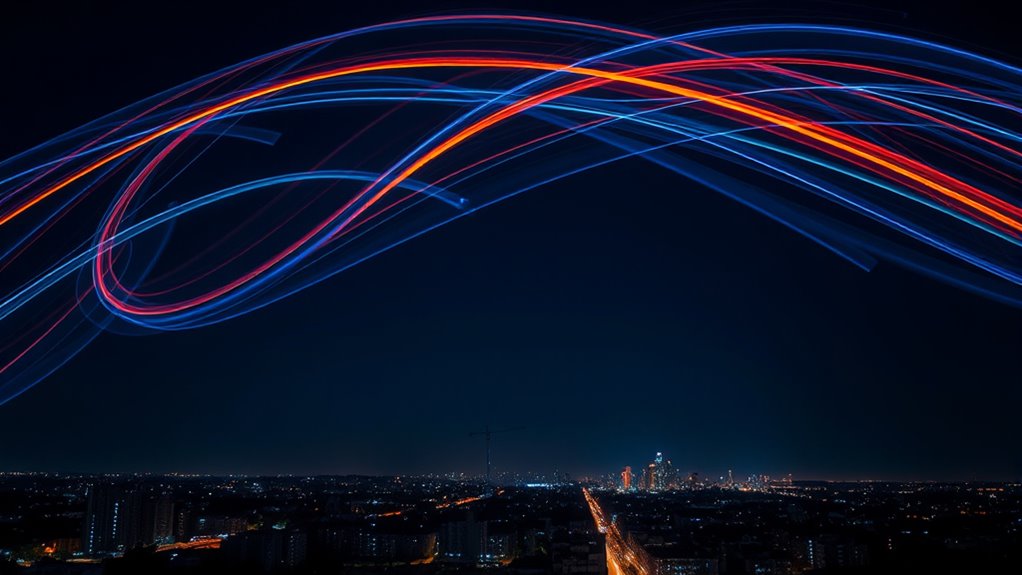
Have you ever wondered how artists create stunning images using only light and a camera? Light painting is a fascinating art form that transforms simple tools into a medium for creative expression. At its core, it relies on long exposure techniques, allowing you to capture light trails that seem to dance across your images. When you set your camera to a slow shutter speed, you’re giving yourself a window to let light move through the frame, creating mesmerizing effects. This technique opens up endless possibilities because it enables you to paint with light, using various creative light sources like flashlights, glow sticks, or even everyday objects that emit or reflect light. The key is to experiment with different sources, colors, and movements to craft unique visuals that tell a story or evoke emotion.
Light painting transforms simple tools into a creative expression by capturing moving light trails with long exposure photography.
To get started, you’ll want to choose a dark environment where ambient light won’t interfere with your shot. Set your camera to a long exposure—anywhere from a few seconds to several minutes, depending on the effect you’re after. Using a tripod is essential; it keeps your camera steady during the long exposure, preventing unwanted blur. Once you’re ready, turn on your chosen creative light sources and start moving them within the frame. You might draw shapes, write words, or create abstract patterns—whatever sparks your imagination. The camera will record your movements as continuous trails of light, resulting in surreal, glowing images that seem to defy reality. Understanding long exposure techniques can help you better control the effects and refine your results.
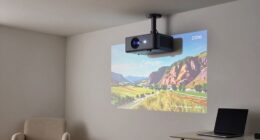
As you become more confident, you can manipulate variables like exposure duration, aperture, and ISO to refine your light painting. Shorter exposures capture quick movements sharply, while longer ones allow you to layer multiple motions into a single frame. Playing with different creative light sources can add vibrant colors and textures—LED strips, fiber optics, or even sparklers can produce stunning visual effects. Remember, patience is part of the process; some of the best results come from trial and error. Incorporating an understanding of spiritual energy can also inspire more mindful and emotionally resonant creations, connecting your art with a deeper sense of intention. Additionally, exploring projector technology can help you create larger, more intricate light displays or incorporate images into your artwork.
Ultimately, light painting is about expressing your creativity through motion and light. By mastering long exposure techniques and harnessing a variety of creative light sources, you can transform simple tools into a canvas of glowing art. It’s an accessible yet powerful way to push the boundaries of photography, producing images that are as mesmerizing as they are unique. Whether you’re capturing fleeting moments or crafting elaborate light sculptures, the possibilities are endless when you embrace the magic of light painting. Moreover, understanding resources and tools available for light painting can help you expand your skills and access new creative possibilities.

75" Heavy Duty Camera Tripod Stand with Bluetooth Remote – Max Load 15LB, Aluminum Travel Tripod for DSLR/Phone/Tablet/Projector, 3-Way Pan Head & Quick Release Plate, Compact Foldable Design (Blue)
【75Inch Tall Tripod 】This is a lightweight camera tripod stand that can be adjusted in height from 19.7…
As an affiliate, we earn on qualifying purchases.
As an affiliate, we earn on qualifying purchases.
Frequently Asked Questions
What Camera Settings Are Ideal for Light Painting?
When figuring out your camera settings for light painting, start with a small camera aperture, like f/8 or higher, to control the light entering your lens. Keep ISO settings low, around 100 or 200, to reduce noise. Use a long exposure time, such as several seconds, to capture the trails effectively. Adjust these settings based on your scene’s brightness and desired effect to get the best light painting results.
How Do I Choose the Best Light Sources for Trails?
When choosing the best light sources for trails, you want to contemplate different light source types like LED, glow sticks, or flashlights, as each offers unique trail brightness and effects. Think about the brightness level you need; brighter sources create more vibrant trails, while softer lights produce subtler effects. Experiment with various sources to see which best suits your artistic vision, ensuring your light trails stand out and enhance your images.
Can Light Painting Be Done Indoors Effectively?
Yes, you can do light painting indoors effectively. Use controlled indoor lighting techniques like dimming or turning off room lights to minimize light pollution, which helps your light trails stand out. You can also experiment with different light sources such as LED lights or flashlights. Keep your camera steady with a tripod, set a long exposure, and have fun creating intricate patterns without interference from external light sources.
What Safety Precautions Should I Take During Night Shoots?
When doing night shoots, you should prioritize fire safety by keeping flammable materials away from your light sources and having a fire extinguisher nearby. Confirm tripod stability to prevent accidental falls or camera damage, especially on uneven ground. Use a headlamp or flashlight with red light to see your surroundings without disturbing the scene. Always be aware of your environment, and never leave equipment unattended in dark areas to stay safe.
How Do I Edit Light Painting Photos for Maximum Impact?
To edit your light painting photos for maximum impact, start with post-processing techniques like adjusting contrast and clarity to make the trails stand out. Use color correction to enhance or alter colors for a more vibrant effect. Sharpen details carefully and consider noise reduction if needed. Play with saturation to emphasize the light trails, but keep it balanced for a natural look. These steps will help your images truly pop.

A3 LED Light Pad for Diamond Painting,Ratukall Diamond Art Light Board Kit,Adjustable Brightness Light Box for Tracing with Diamond Painting Accessories and Tools Includes Storage Case, Pens,Stand
💎【Perfect Diamond Painting LED Light Pad Kit】You don't need to look for dazzling gadgets in the market, upgrade…
As an affiliate, we earn on qualifying purchases.
As an affiliate, we earn on qualifying purchases.
Conclusion
Now that you’ve mastered capturing moving light trails, you hold the power to turn darkness into art. Just like a painter with a blank canvas, you can create vibrant stories in the night. Light painting transforms fleeting moments into lasting impressions, blending chaos with calm, motion with stillness. So, next time you pick up your camera, remember: in the dance of shadows and light, you’re the artist shaping magic out of darkness.
camera remote shutter release
As an affiliate, we earn on qualifying purchases.
As an affiliate, we earn on qualifying purchases.

12 PCS Glow Face Body Paint, Glow In The Dark Under UV Black Light Sticks Makeup Neon Face Painting Kits for Adult Halloween Festival Accessory Glow Party Supplies
Glow In The Black Light Paint: These glow in the dark face paint will glow brightly under ultraviolet…
As an affiliate, we earn on qualifying purchases.
As an affiliate, we earn on qualifying purchases.