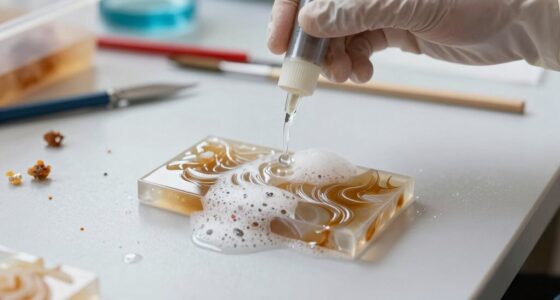

Use this guide to choose art supplies for a specific kind of artwork, set a spending limit, and assemble a small kit you can start using right away. It is written for beginners and artists returning to a practice who want to avoid buying tools they do not need. Allow 1–2 hours to compare options, purchase or gather materials, and set up a place to work.

Get art and craft supplies delivered free with Prime
- Fast, free delivery on millions of items
- Prime Video, Amazon Music and more included
- Member-only deals all year
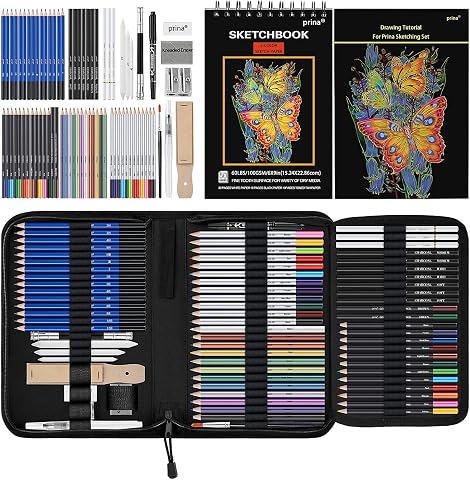
Prina 76-Piece Drawing Set Sketching Kit with 3-Color Sketchbook and Tutorial
- ✔ Total pieces: 76
- ✔ Pencil types: Graphite, charcoal, watercolor, oil-based colored, and metallic
- ✔ Sketchbook: 6 x 9 inches, spiral bound, 50 pages, 100 GSM

Faber-Castell Kneadable Eraser with Storage Case, Grey
- ✔ Brand: Faber-Castell
- ✔ Model number: 127220
- ✔ Item type: Kneadable eraser
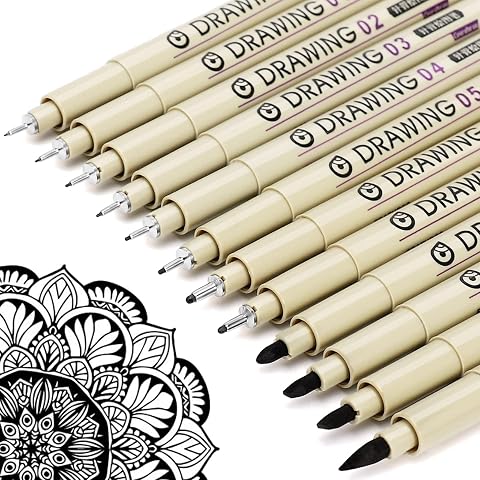
Muchcute Micro Fineliner Drawing Art Pens, 12 Black
- ✔ Brand: KOUSICOO
- ✔ Model number: ZGB-12
- ✔ Count: 12 pens
Difficulty: Beginner | Time: 1–2 hours
What You’ll Need
Tools & Materials:
- A notebook or phone for a supply list
- A measuring tape or a clear estimate of your available workspace
- A budget for initial supplies
- Access to an art store, online shop, or materials you already own
Knowledge:
- The subject or kind of artwork you want to make
- A basic idea of whether you want to draw, paint, print, sculpt, or work digitally
Start with the medium you are most likely to use in the next month. Supply needs vary by material, and a focused starter kit is easier to store, learn, and replenish than a large mixed set. Check product labels for age, ventilation, and handling guidance, especially for solvents, spray products, and pigments.
Prina 76-Piece Drawing Set Sketching Kit with 3-Color Sketchbook and Tutorial
For artists who want one purchase to open up several drawing approaches, the Prina 76-piece set is the most complete option in this lineup. Its mix of graphite, charcoal, watercolor, oil-based colored, and metallic pencils gives us room to move between tonal sketching, color, and more experimental marks. The included white, tan, and black sketchbook pages also invite different treatments: dark paper makes white charcoal useful, while tan pages can give colored or graphite work a warmer base.Compared with the Faber-Castell eraser or Muchcute pens, this kit does more to establish a drawing setup from scratch. The case, blending tools, brush, water brush, erasers, and tutorial make it a practical pick for learners or artists who want to test several materials before buying specialized supplies. That breadth has a cost in simplicity: 76 pieces can feel like a lot to sort through, especially for someone who has not yet settled on a medium. The product information also notes that its leads can be softer than professional-grade alternatives and may break more easily, so artists who press hard or need dependable daily studio pencils may prefer more specialized tools.We place it first because it covers the widest set of artist needs in this three-product comparison. It will not replace a refined collection of professional materials, and the kneaded eraser or fineliners remain more precise for their respective tasks. But as a portable, varied introduction to drawing, it gives us the strongest all-around foundation.
Pros:
- Includes graphite, charcoal, watercolor, oil-based colored, and metallic pencils.
- Three-color sketchbook supports work on white, tan, and black paper.
- Travel case and blending accessories keep a varied kit organized.
- Tutorial offers a starting point for artists learning basic techniques.
Cons:
- The large number of pieces may overwhelm absolute beginners.
- Softer leads may break more easily than professional-grade alternatives.
- A broad starter assortment may not satisfy artists seeking specialized premium materials.
Best for: Beginners and developing artists who want to explore several drawing media with a sketchbook and accessories included.
Not ideal for: Artists who already have a preferred medium and want fewer, more durable professional-grade pencils or a narrowly focused tool.
Bottom line: Choose the Prina set when we want the broadest portable drawing setup and are comfortable trading simplicity and lead durability for variety.
“Choose the Prina set when we want the broadest portable drawing setup and are comfortable trading simplicity and lead durability for variety.”
Faber-Castell Kneadable Eraser with Storage Case, Grey
The Faber-Castell kneadable eraser earns its place by doing one job with more flexibility than a conventional block: we can shape it into a point, edge, or small flat surface to lift marks from specific areas. That makes it useful for refining highlights or lightening graphite, charcoal, pastel, and pencil without sweeping away every mark nearby. The description also states that it leaves no residue, which helps keep a drawing surface tidy during repeated corrections.Against the Prina kit, this is a much narrower purchase but a more focused addition for artists who already own drawing tools. Prina includes a kneaded eraser among its accessories, so an artist choosing the full kit may already have this function covered. Compared with the Muchcute fineliners, the Faber-Castell tool is less about adding a new kind of mark and more about controlling the marks already on the page. Its snap-closure case protects the pliable eraser in a bag or drawer, an especially practical detail for a material that can pick up dust and debris.The tradeoff is straightforward: one eraser will not expand a collection on its own, and heavy users may need replacements. It is best considered a useful, portable studio basic rather than a complete art-supply solution. We rank it second because it offers a clear benefit across several drawing media, though its overall range is much smaller than the Prina kit.
Pros:
- Pliable material can be shaped for detailed corrections.
- Suitable for charcoal, graphite, pastel, and pencil work.
- Leaves no residue according to the product description.
- Reusable snap-closure case protects the eraser and supports portability.
Cons:
- Only one eraser is included, which may mean frequent replacement for heavy users.
- It is a specialized accessory rather than a broad addition to an art setup.
Best for: Artists who work with graphite, charcoal, pastel, or pencil and want a shapeable tool for controlled lifting and lightening.
Not ideal for: Artists seeking a complete set of supplies, or those who already have a kneaded eraser included in a kit.
Bottom line: Choose this Faber-Castell eraser when precise, reusable mark lifting matters more than adding new drawing media.
“Choose this Faber-Castell eraser when precise, reusable mark lifting matters more than adding new drawing media.”
Muchcute Micro Fineliner Drawing Art Pens, 12 Black
When our work depends on clean outlines, small details, or deliberate shifts in line weight, the Muchcute 12-pen set is the specialist pick. Its listed nibs range from 0.2 mm to 3 mm and include a brush tip, so we can move from fine marks to broader strokes without changing to a separate ink system. The waterproof archival pigment ink is described as quick-drying and fade-resistant, making this set more appropriate for finished line work than the graphite and colored-pencil emphasis of the Prina kit.That narrower purpose is also the main reason it ranks third overall. The Prina set can support a wider range of media, and the Faber-Castell eraser addresses corrections in several drawing materials; these pens are primarily for artists who want black ink lines. Waterproof ink can be useful when a drawing will be layered with other media, but the product details do not specify compatibility with every marker, paint, or paper. We should still check the intended materials in our own workflow.The nib range gives the set flexibility, but extra-fine tips are delicate and can be damaged by excessive pressure. Artists who naturally draw with a heavy hand should take care, and those who need color or pencil shading will need other supplies alongside the pens. For illustrators, journal artists, and sketchers who want multiple black line weights in one set, the Muchcute option fills a distinct role that neither of the other picks covers as directly.
Pros:
- Twelve pens offer tip widths from 0.2 mm to 3 mm plus a brush tip.
- Waterproof archival pigment ink is described as quick-drying and fade-resistant.
- Nylon nibs are specified for smooth, skip-free line work.
- Useful for drawing, lettering, sketching, and journaling.
Cons:
- Extra-fine nibs can be damaged if pressed too hard.
- The black-ink focus is less versatile than the mixed-media Prina set.
- Artists who need shading or color must add other tools.
Best for: Illustrators, sketchers, and journal artists who want several black line widths and waterproof pigment ink for detailed work.
Not ideal for: Artists looking for colored media, a complete drawing kit, or tools suited to heavy pressure on fine nibs.
Bottom line: Choose the Muchcute pens when varied, durable black line work is central to our practice and we can draw with a light touch.
“Choose the Muchcute pens when varied, durable black line work is central to our practice and we can draw with a light touch.”
As an Amazon Associate we earn from qualifying purchases.
Before You Start
Write down one or two projects you would like to make. Use them to guide your choices: a sketchbook study needs different materials from a large watercolor painting or a clay sculpture. Set a spending limit before browsing, and reserve part of it for paper, canvas, or another surface. These are used up quickly, while specialty tools can wait until a project calls for them.
Check what you already own. A pencil, household cup for water, or clean table may cover a basic need. Do not buy replacements simply because they appear in a starter kit.
Step-by-Step Instructions
Step 1: Choose a medium and a first project
Select one main medium for your first kit: drawing, watercolor, acrylic, oil, printmaking, or another process you already want to try. Then choose a simple project, such as a page of object sketches or a small landscape. Write down the size and surface the project will need.
Use this project as a filter while shopping. If an item does not help you make it or care for its materials, leave it off the first list.
Tip: If you are undecided, begin with pencil drawing. It needs few supplies and makes it easy to practice line, shape, and value.
Check: You can describe your first project in one sentence and name the medium and surface it requires.
Step 2: Set a budget and divide it by need
Choose a total amount you can spend without affecting essential expenses. Divide it among the main material, the surface, basic tools, and storage or cleanup. Spend first on reliable materials that directly affect your chosen project, such as paper suited to wet media or a small set of lightfast paints for work you plan to keep.
Compare the quantity and size of products, not just the package price. A large set may cost more while including colors or tools you will rarely use.
Tip: Leave room for replacement surfaces and one or two useful extras. Avoid buying a full studio setup for a single beginner project.
Check: Your list has a clear spending cap, and the essential materials fit within it.
Step 3: List the core supplies for your medium
Write down the smallest set that lets you complete your project. For drawing, this may be a few graphite pencils, an eraser, a sharpener, and a sketchbook or drawing paper. For watercolor, consider a small paint set, watercolor paper, brushes in a few sizes, a mixing surface, water containers, and paper towels. For acrylic, list paint, a suitable surface, brushes, a palette, water, and a cloth for cleanup.
For oil painting, include an oil-compatible surface, brushes, paints, a palette, and cleanup materials specified for the products you choose. Read the manufacturer’s handling instructions for any medium or solvent. For clay or printmaking, check that you can use the material safely in your workspace and have the required surface, tools, and cleanup method.
Tip: Use a short list tailored to your project. The exact supplies depend on the medium and the maker’s product instructions.
Check: Every listed item has a clear purpose in making, supporting, or cleaning up after the first project.
Step 4: Choose a small, compatible selection
Pick a few versatile tools instead of a large assortment. Start with a limited palette of colors that can mix into a useful range, or a small range of drawing grades you know how to use. Choose paper or another surface labeled for your medium; thin sketch paper can buckle under wet paint, while a rough surface may not suit detailed drawing.
Check that components work together. A brush should suit the paint, a surface should accept the medium, and a storage method should protect materials from moisture, heat, or dust as directed on the packaging.
Tip: When possible, compare individual products or small starter sets in person. A compact set makes it easier to learn how each material behaves.
Check: The selected tools and surfaces are appropriate for the same project and medium.
Step 5: Check labels and workspace needs
Read product labels before purchase. Look for the intended surface, cleanup method, drying or storage guidance, and any warnings. Confirm that your workspace has enough light, a stable work surface, and room to place materials without knocking them over.
For products that release fumes, create dust, or require special handling, follow label directions and make sure your space supports them. If it does not, choose a suitable alternative or work in an appropriate location.
Tip: Keep food and drinks away from work materials. Store paints, blades, solvents, and other potentially hazardous supplies where children and pets cannot reach them.
Check: You know how to use, clean, and store each material, and the workspace can support the work safely.
Step 6: Buy or gather only the essentials
Use your list to gather the core supplies and check each item off. Buy enough surface material to practice and complete the project, but avoid bulk purchases until you know which products you prefer. Keep receipts and packaging for products you may need to exchange or identify later.
If a product is unavailable, choose another item labeled for the same medium and purpose. Do not substitute a surface or cleaner unless its instructions confirm compatibility.
Tip: For online orders, check package size, shipping costs, and whether the listing is for one item or a set before checkout.
Check: You have the materials needed to begin the project, and the purchase stays within your budget.
Step 7: Set up and test the materials
Clear the work surface, place materials within reach, and protect the table if your medium can stain or scratch it. Open only what you need. On a spare piece of the same surface, test a line, wash, color mix, or small sample before beginning the finished work.
Notice how the material responds. Check whether the paper absorbs water, whether the paint spreads as expected, or whether a pencil grade is too soft or too faint for your purpose. Adjust your technique or swap the material before committing to the project.
Tip: Keep a small test sheet with the product names or pencil grades written beside the samples. It helps you repeat results later.
Check: Your materials perform as expected on the chosen surface, and you can start the project without guessing how they behave.
Step 8: Organize supplies for safe reuse
Return unused materials to their original containers and follow the label’s storage directions. Separate clean tools from used ones, wash or wipe tools using the recommended method, and let wet tools dry before putting them away. Keep paper and other surfaces flat and dry where possible.
Place frequently used items together in a box, drawer, or portable case. Store products with special handling instructions according to their labels, and keep those instructions available.
Tip: Do not pour paint, solvents, or other materials down a drain unless the product instructions and local disposal rules allow it.
Check: The kit is easy to find, tools are clean or safely contained, and materials are stored as directed.
Common Mistakes to Avoid
- Buying a large assortment before choosing a project. — Pick a first project and buy only the supplies needed to complete it. Add specialized tools after you have a specific use for them.
- Using a surface that is not made for the medium. — Check the surface label for compatibility. Test a small sample before using it for finished work.
- Spending most of the budget on tools and too little on surfaces. — Include enough paper, canvas, or other working material for both practice and the project in your budget.
- Ignoring cleanup and storage requirements. — Read product instructions before purchase and set aside the right cleanup materials and storage space.
Troubleshooting
Problem: The paint buckles or soaks through the paper.
Solution: Stop and test on paper labeled for that paint or wet medium. Use a heavier or more suitable surface for the remaining work.
Problem: Colors look dull or do not mix as expected.
Solution: Check that the paints are compatible and intended for the same process. Test smaller amounts on a palette and record the colors used before making another mix.
Problem: A tool is difficult to control.
Solution: Try a simpler size or grade that suits the scale of your project. Make practice marks on a spare surface before continuing.
Problem: Cleanup leaves residue or damages a tool.
Solution: Pause and check the product and tool instructions for the recommended cleaner. Do not use a substitute cleaner unless the manufacturer says it is suitable.
What Success Looks Like
Your kit is ready when it contains the materials needed for one defined project, the tools and surfaces suit the chosen medium, and the total cost stays within your set budget. You have tested the materials on a spare surface, know how to clean and store them, and can begin work without another essential purchase.
Next Steps
Complete the first project and note which supplies you used, which ran out, and which were difficult to handle. Replenish only the materials you used regularly. Add a new tool when a project or a repeated problem gives you a clear reason to do so. Keep a short list of preferred brands, sizes, and surface types so future purchases take less time.
Frequently Asked Questions
How many art supplies should a beginner buy?
Buy enough to complete one small project and practice on spare material. For many mediums, a few versatile tools and a limited range of colors are sufficient to start.
Should I buy student-grade or professional-grade materials?
Student-grade materials can suit practice and early projects. Choose professional-grade products when you need qualities such as stronger pigment, archival performance, or reliable results for finished work, and compare labels for the property that matters to you.
Can I use ordinary paper for painting?
Some papers can handle light applications, but ordinary thin paper may buckle, tear, or let paint show through. Use paper labeled for your medium, and test it before starting a finished piece.
What supplies should I upgrade first?
Upgrade the item that limits your work most often. That may be the surface, a frequently used brush, or a core material whose behavior is inconsistent. Use your notes from completed projects to identify the need.