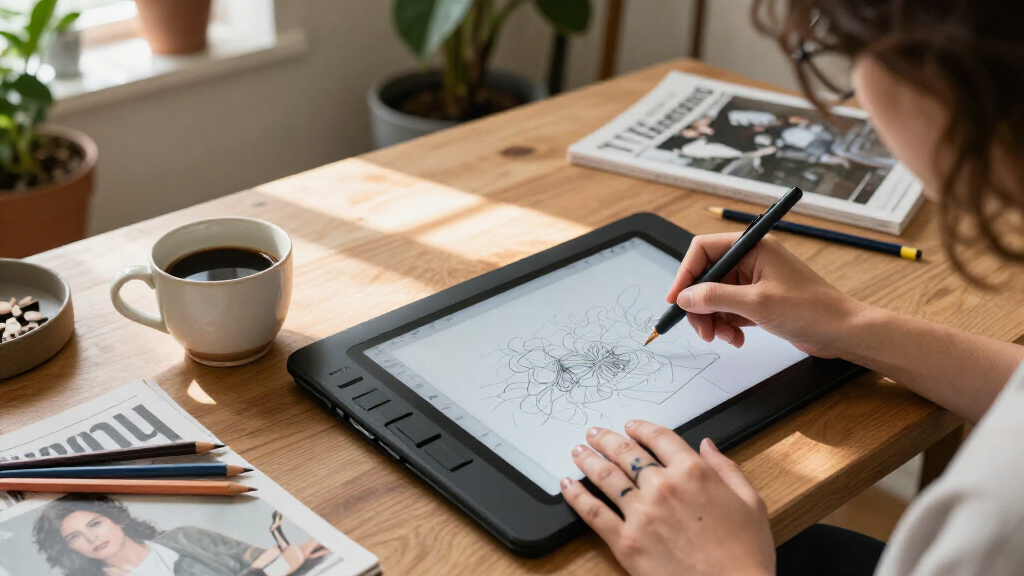

Choose a digital art tablet for your creative work, connect it to a computer or prepare it for standalone use, and confirm that its pen and drawing software work together. This guide is for beginners comparing their first tablet and creators replacing an existing setup. Allow 1–2 hours for research, setup, and a basic drawing test.

Get art and craft supplies delivered free with Prime
- Fast, free delivery on millions of items
- Prime Video, Amazon Music and more included
- Member-only deals all year

HUION Kamvas Pro 16 Drawing Tablet with Screen
- ✔ Display: 15.6-inch fully laminated anti-glare screen
- ✔ Color gamut: 120% sRGB; 92% AdobeRGB
- ✔ Contrast ratio: 1000:1

XP-Pen Artist 13.3 Pro Drawing Tablet with Screen
- ✔ Display: 13.3-inch fully laminated FHD
- ✔ Color gamut: 88% NTSC; 91% Adobe RGB; 123% sRGB
- ✔ Stylus: Battery-free; 16,384 pressure levels; 60° tilt; 220 RPS

PicassoTab A10 10-Inch Standalone Drawing Tablet
- ✔ Display: 10-inch LCD, 2000 × 1200 resolution
- ✔ Operating system: Android 14
- ✔ Processor and memory: Octa-core processor; 6GB RAM
Difficulty: Beginner | Time: 1–2 hours
What You’ll Need
Tools & Materials:
- A computer, tablet, or phone compatible with the model you select
- Internet access to check compatibility and download drivers or software
- A drawing program or app
- A charging cable or power adapter, if required
- A comfortable desk or stable drawing surface
Knowledge:
- Basic familiarity with your device’s operating system
- A general idea of what you plan to draw and where you prefer to work
Set a spending limit before comparing models. Include any likely extra costs, such as a screen protector, stand, replacement nibs, or paid drawing software. Check the maker’s current compatibility list for your exact device and operating system version.
HUION Kamvas Pro 16 Drawing Tablet with Screen
The Kamvas Pro 16 earns our top spot for creators who draw at a desk and want more room on the display itself. Its 15.6-inch screen gives sketches, interface panels, and reference material more breathing space than the XP-Pen Artist 13.3 Pro. The fully laminated, anti-glare surface is designed to keep the pen close to the visible mark while reducing distracting reflections; its slight drawing texture may also appeal to artists who prefer a less slick surface.Workflow controls make the larger workspace more useful. Six express keys and a touch bar provide shortcuts without requiring every action to go through the keyboard, and the included stand adjusts from 20 to 60 degrees. The battery-free pen recognizes tilt and has two programmable side buttons. HUION lists a 120% sRGB gamut and 92% AdobeRGB, which will interest creators who pay attention to color coverage, though those figures alone do not establish color accuracy.The key tradeoff is that this is a computer-connected pen display, not a portable standalone tablet. It needs a laptop or computer and uses a 3-in-1 connection with HDMI signal, so setup depends on a compatible desk arrangement. Compared with the PicassoTab, it offers a larger screen and more tailored drawing controls but cannot work independently. Choose the XP-Pen instead if a smaller display better suits your desk or you prefer its dial and eight-key layout.
Pros:
- 15.6-inch fully laminated anti-glare display with a slight drawing texture
- Battery-free pen supports tilt recognition and programmable side buttons
- Touch bar and six express keys provide customizable controls
- Included stand adjusts from 20° to 60°
Cons:
- Requires a connected computer or laptop
- Uses a 3-in-1 cable with HDMI signal, which may shape desk setup
Best for: Desk-based illustrators who want a larger drawing surface, adjustable viewing angle, and built-in shortcut controls with a connected computer.
Not ideal for: Creators who need an all-in-one tablet, a compact travel setup, or a display that works without a computer.
Bottom line: For computer-based creators who value a roomier canvas, the Kamvas Pro 16 is the strongest fit in this lineup, provided its wired setup works for them.
“For computer-based creators who value a roomier canvas, the Kamvas Pro 16 is the strongest fit in this lineup, provided its wired setup works for them.”
XP-Pen Artist 13.3 Pro Drawing Tablet with Screen
The Artist 13.3 Pro is the balanced choice for creators who want a pen display without moving up to the HUION’s larger footprint. Its fully laminated 13.3-inch FHD screen keeps the working area more compact, which can suit a crowded desk or a creator who prioritizes a smaller display. The battery-free stylus supports 60-degree tilt and 16,384 pressure levels, pairing expressive pen input with a setup that does not require charging the stylus.Its distinctive advantage is the control layout: a red dial and eight customizable shortcut keys let us put common actions close at hand. That makes it a different proposition from the HUION, whose touch bar and six express keys favor another kind of shortcut arrangement. The XP-Pen also includes a foldable stand, pen holder, replacement nibs, and the cables and power adapter needed for its connected setup.There is a practical limit to the compact format: the 13.3-inch screen gives less room than the 15.6-inch Kamvas Pro 16, especially when software panels compete with the canvas. Like the HUION, this is not an independent tablet; it must connect to a computer or laptop. Compared with the PicassoTab, it offers a more specialized pen-display workflow and more shortcut controls, but it depends on a computer and its workspace. It makes sense when desk space and direct controls matter more than maximizing canvas size.
Pros:
- Fully laminated 13.3-inch FHD display designed to reduce parallax
- Battery-free stylus supports 60° tilt and 16,384 pressure levels
- Red dial and eight customizable shortcut keys
- Foldable stand, pen holder, and replacement nibs included
Cons:
- Requires a connected computer or laptop
- Smaller working area than the 15.6-inch HUION Kamvas Pro 16
Best for: Creators with a computer-based workflow who want a compact pen display and hands-on dial and shortcut-key controls.
Not ideal for: Artists who need a standalone device or want a larger on-screen canvas for detailed work and open software panels.
Bottom line: The Artist 13.3 Pro suits creators who want a compact, control-rich pen display and already have a compatible computer.
“The Artist 13.3 Pro suits creators who want a compact, control-rich pen display and already have a compatible computer.”
PicassoTab A10 10-Inch Standalone Drawing Tablet
The PicassoTab A10 fills a role the two pen displays cannot: it can be used for drawing without a computer. That makes it the most flexible pick for creators who want to sketch in different rooms, travel light compared with a laptop-and-display setup, or start with a self-contained device. The 10-inch laminated LCD has a 2000 × 1200 resolution, and the included pressure-sensitive pen supports 4096 levels.Its beginner-oriented bundle sets it apart from the XP-Pen and HUION. Five creative apps, tutorials, a case, drawing glove, universal power adapter, and pre-installed screen protector give new users a ready-to-start kit. Android 14 and an octa-core processor support drawing alongside everyday tablet tasks. Storage starts at 64GB and can be expanded up to 1TB, so creators who plan to keep a growing library of files should factor in the expansion option.The convenience comes with compromises. Its 10-inch screen is the smallest here, and it does not offer the dial-and-key controls of the XP-Pen or the larger drawing surface and touch bar of the HUION. The stated software update-support timeline is unknown, so long-term platform support is less clear from the supplied details. Compared with either pen display, the A10 trades desk-focused workspace and controls for independence. It is best for learning, casual illustration, and portable creation; artists with demanding computer-based workflows should consider one of the larger displays instead.
Pros:
- Standalone Android tablet works without a computer
- Laminated display and 4096-level pressure-sensitive pen
- Includes five creative apps, beginner tutorials, and accessories
- Storage can expand beyond the included 64GB
Cons:
- Smaller 10-inch display than either computer-connected pen display
- Software update-support timeline is unspecified
- Base storage is 64GB, which may prompt expansion for larger libraries
Best for: Beginners and mobile creators who want an all-in-one drawing tablet with apps and tutorials included.
Not ideal for: Artists who need a large canvas, desktop drawing software on a pen display, or a clearly stated future software-update timeline.
Bottom line: The A10 is the clearest choice for independent, beginner-friendly drawing, as long as its smaller screen and uncertain update timeline fit your needs.
“The A10 is the clearest choice for independent, beginner-friendly drawing, as long as its smaller screen and uncertain update timeline fit your needs.”
As an Amazon Associate we earn from qualifying purchases.
Before You Start
Know the difference between the main tablet types. A pen tablet has a drawing surface without a built-in screen; you look at your computer monitor while drawing. A pen display shows the image beneath the pen but must connect to a computer or another supported device. A standalone drawing tablet runs apps on its own and can be used without a computer. Each type supports different work habits and has different space, connection, and cost needs.
Check whether a model requires a driver, a particular cable, a power source, or a supported port. A tablet may be physically connectable yet incompatible with your device or software. Read the manufacturer’s current setup instructions before buying or installing anything.
Step-by-Step Instructions
Step 1: List your drawing needs
Write down what you plan to make, how often you will draw, and where you will work. Note whether you need portability, a built-in screen, a larger drawing area, or standalone operation. Include practical limits such as desk space and spending limit.
Tip: If you mostly draw at a desk and already own a computer, a pen tablet can be a lower-cost starting point. If you want to draw directly on the image, compare pen displays and standalone tablets.
Check: You have a short list of must-haves and a spending limit.
Step 2: Choose a tablet type
Compare pen tablets, pen displays, and standalone drawing tablets against your list. Check where the drawing app runs, what devices the tablet connects to, and whether you can use it away from a desk. Choose the type that suits your workflow before comparing individual models.
Tip: A screen is not the only measure of drawing comfort. A pen tablet can be accurate and responsive, but may take practice because your hand and the cursor are on separate surfaces.
Check: You can explain how your chosen tablet will connect to a device and where your drawing app will run.
Step 3: Compare compatible models
Check each model’s active drawing area, pen features, connection options, included accessories, warranty, and compatibility with your operating system and drawing app. Compare the usable drawing area with your desk or travel setup; a larger surface needs more room. Confirm whether the pen needs charging and how replacement nibs are obtained.
Tip: Pressure sensitivity and shortcut buttons can be useful, but do not rely on a single specification to predict comfort. Read current manufacturer details and, when possible, try the pen in person.
Check: You have selected a model that fits your budget, space, device, and software.
Step 4: Prepare your device and workspace
Update your computer or standalone tablet if needed, charge the tablet and pen, and clear a stable space for drawing. Find the manufacturer’s setup guide and driver download page. Save any open work before changing drivers or restarting your device.
Tip: Use the official manufacturer website for drivers. Avoid installing multiple tablet drivers at once, since they can conflict.
Check: The device is ready, the tablet has power, and you can reach the correct setup instructions.
Step 5: Connect the tablet and install its software
Follow the manufacturer’s connection order. Connect all required cables and power, then install the driver or companion app for your exact model and operating system. Restart the computer if the installer requests it. For a standalone tablet, complete its first-run setup and install a supported drawing app.
Tip: Some pen displays need both a data connection and a separate power connection. A charge-only cable may not carry drawing data.
Check: The setup app or operating system recognizes the tablet, and no connection or driver error appears.
Step 6: Set up the pen and drawing surface
Open the tablet settings and select the correct screen or monitor if prompted. Set the tablet’s orientation and active area, then adjust pen pressure or button functions only as needed. Open your drawing app, select a brush, and check that the canvas and cursor are on the intended screen.
Tip: Start with default pressure and button settings. Change one setting at a time so you can identify what improves or disrupts the feel.
Check: The pen cursor appears where expected, and the tablet maps to the intended display or work area.
Step 7: Test drawing, pressure, and controls
Create a new test canvas. Draw slow lines, quick strokes, light marks, and firm marks. Try the eraser or pen buttons if available, and use a shortcut only after confirming how it is assigned. Save the test file, then reopen it to check that the app and tablet retain your setup.
Tip: If you are using a pen tablet, keep your eyes on the monitor while drawing. Short practice sessions can help you coordinate hand movement with the on-screen cursor.
Check: Strokes appear without gaps or unexpected jumps, light and firm pressure produce distinguishable results where supported, and the file saves and reopens.
Common Mistakes to Avoid
- Buying a tablet before checking device and software compatibility. — Confirm the exact model, operating system version, connection requirements, and drawing app support on the manufacturer’s current compatibility information.
- Assuming every tablet with a screen works on its own. — Check whether the model is a standalone tablet or a pen display that needs a separate computer or compatible host device.
- Installing a driver from an unofficial download site or installing several tablet drivers. — Use the manufacturer’s official support page and remove conflicting drivers by following its instructions.
- Changing several pen settings before testing the default setup. — Test default behavior first, then adjust one setting at a time and repeat the same strokes.
Troubleshooting
Problem: The tablet powers on but the computer does not recognize it.
Solution: Check that each required cable is connected to the correct port, try a supported data cable and port, and confirm that the driver matches the model and operating system. Restart the computer if the maker’s setup guide recommends it.
Problem: The pen moves the cursor on the wrong monitor or only part of the screen.
Solution: Open the tablet settings, select the intended display, and remap the active area. Check orientation and display arrangement in the computer’s screen settings.
Problem: The cursor moves but drawing software makes no marks.
Solution: Select a brush tool, verify that the correct layer is active and unlocked, and check the app’s tablet input settings. Test in another supported drawing app to identify whether the issue is app-specific.
Problem: Pressure-sensitive strokes all look the same or lines break up.
Solution: Confirm that pressure sensitivity is enabled in the app and driver, then test with a pressure-enabled brush. Reseat the pen nib gently if the maker’s instructions allow it, charge the pen if needed, and check for driver updates.
What Success Looks Like
Your tablet is recognized by its host device, the drawing app receives pen input, and the pen maps to the intended screen or area. You can make continuous strokes, see pressure variation where supported, use expected controls, and save and reopen a test drawing.
Next Steps
Keep the manufacturer’s setup page and driver download information handy. After a short practice period, adjust pressure, shortcuts, or the active area to suit your hand and drawing habits. Store the pen safely, replace worn nibs according to the maker’s guidance, and install driver updates when they address a problem or add needed support.
Frequently Asked Questions
Do I need a tablet with a screen to make digital art?
No. A pen tablet without a screen can work well when connected to a computer, though it takes practice to look at the monitor while drawing. Choose a screen model if drawing directly on the image fits your workflow and budget.
Can I use any drawing app with my tablet?
No. App and operating system support varies. Check the tablet maker’s compatibility information and the app’s supported input devices before buying or installing software.
What drawing area should I choose?
Choose an area that fits your desk and the size of movements you prefer. A small tablet is easier to carry; a larger area allows broader arm movements but takes more space. If possible, try a similar size before purchasing.
Why does my pen tablet feel awkward at first?
Your hand moves on the tablet while you watch the cursor on a separate screen. Practice tracing simple shapes and drawing short lines for a few sessions before changing settings or concluding that the tablet does not suit you.
Should I buy a model with more shortcut buttons?
Only if you expect to use them. Buttons can speed up repeated actions, but keyboard shortcuts or on-screen controls may work just as well. Prioritize compatibility, drawing area, pen feel, and connection needs first.