
When your oil painting’s varnish becomes dull, yellowed, or cracked, it can obscure all the vibrancy and detail you love. This often happens over time due to natural aging, environmental factors, or chemical changes. Removing old varnish or reapplying a fresh layer can restore the original brilliance, but it requires careful technique. If you’re unsure, professional help can guarantee your artwork stays protected and looks its best—learn more about when and how to restore properly.
Key Takeaways
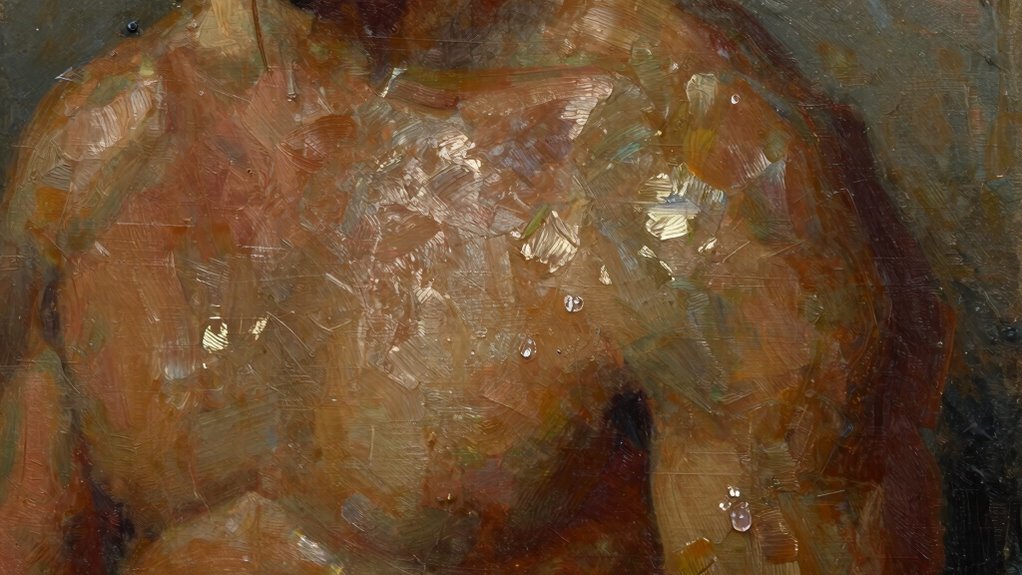
- Excessive shine may indicate over-application or outdated varnish that needs removal or reapplication.
- A duller surface can signal the need for varnish cleaning or reapplication to restore original vibrancy.
- Uneven or streaky gloss suggests improper varnish application or deterioration requiring professional assessment.
- Persistent gloss issues may benefit from gentle varnish removal, revealing the original paint beneath.
- Consulting a conservator ensures appropriate techniques are used to manage unwanted shine without damaging the artwork.

Winsor & Newton Artisan Varnish Remover, 75ml (2.5-oz) bottle
Apply generously onto a lint free cloth and gently rub into the varnish film
As an affiliate, we earn on qualifying purchases.
As an affiliate, we earn on qualifying purchases.
How Can You Tell If Your Oil Painting’s Varnish Is Deteriorating?

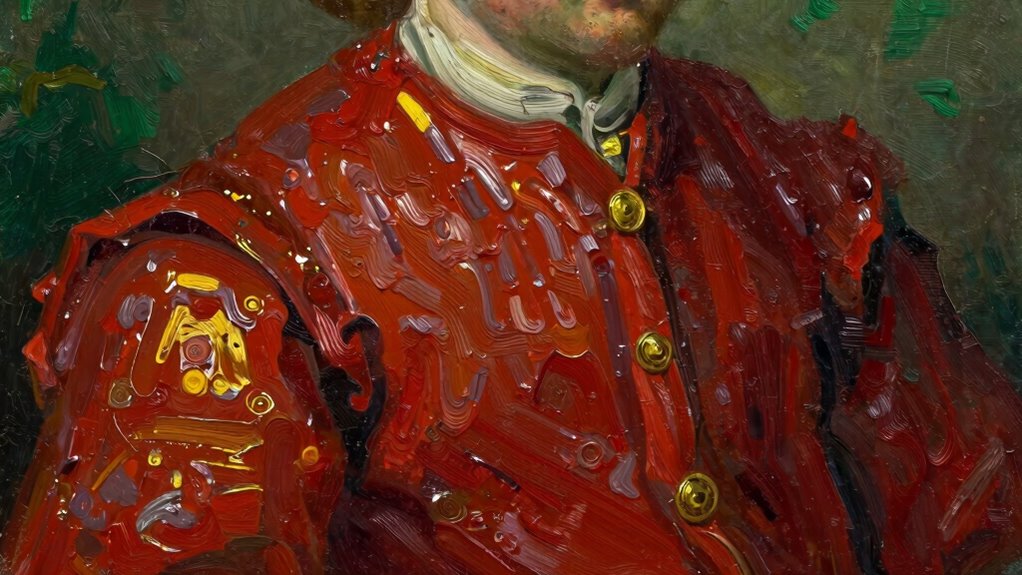
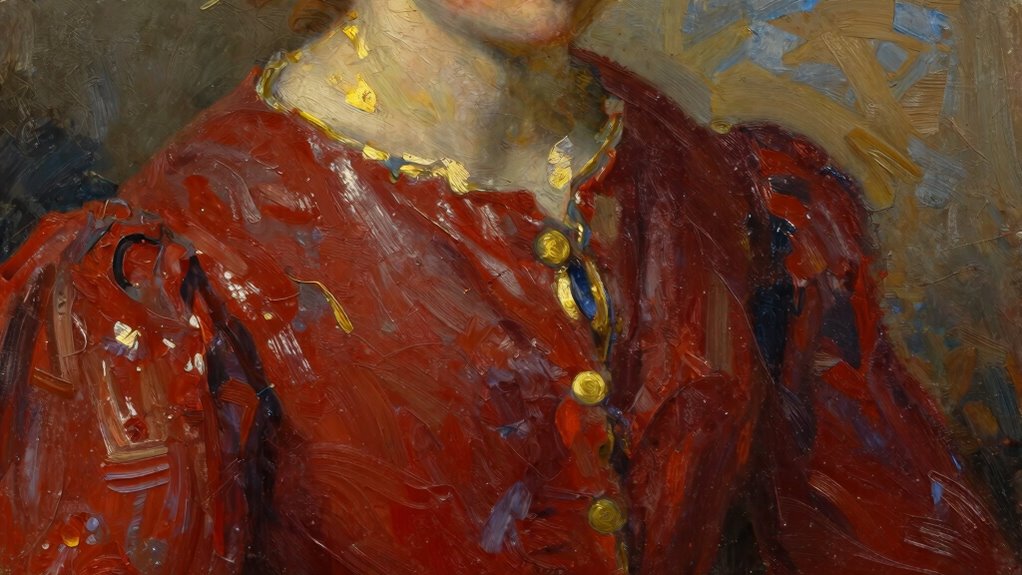
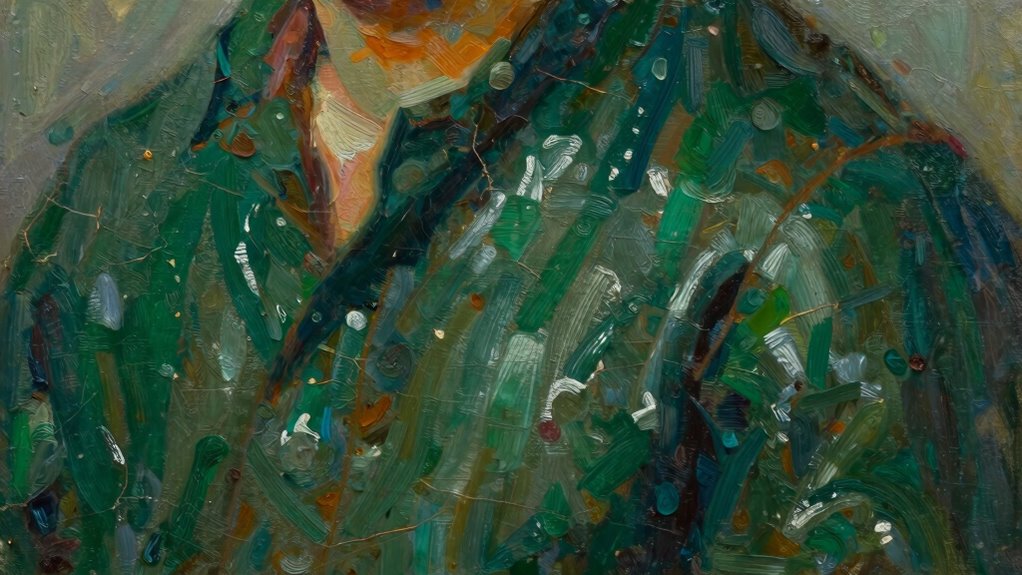
If your oil painting’s varnish is deteriorating, you’ll notice several clear signs. One of the most common is varnish aging, which causes a dull or cloudy appearance over the surface. You might observe a noticeable color shift, where the once vibrant hues appear muted or yellowed. This change often dulls the contrast and depth of your artwork, making it look older than it is. Cracks or a sticky texture can also indicate varnish deterioration, but these are typically more advanced signs. Regularly inspecting your painting under good lighting helps you catch these issues early, and understanding color accuracy can help you better assess the true condition of your artwork. Recognizing these signs allows you to determine when the varnish needs cleaning, restoration, or replacement to restore your painting’s original brilliance. Understanding how artwork aging affects oil paintings can also help in planning proper preservation techniques.
Decoart DuraClear Varnish, Gloss DS19-9, 8 fl oz Bottle
As an affiliate, we earn on qualifying purchases.
As an affiliate, we earn on qualifying purchases.
What Causes Varnish to Yellow or Crack Over Time?
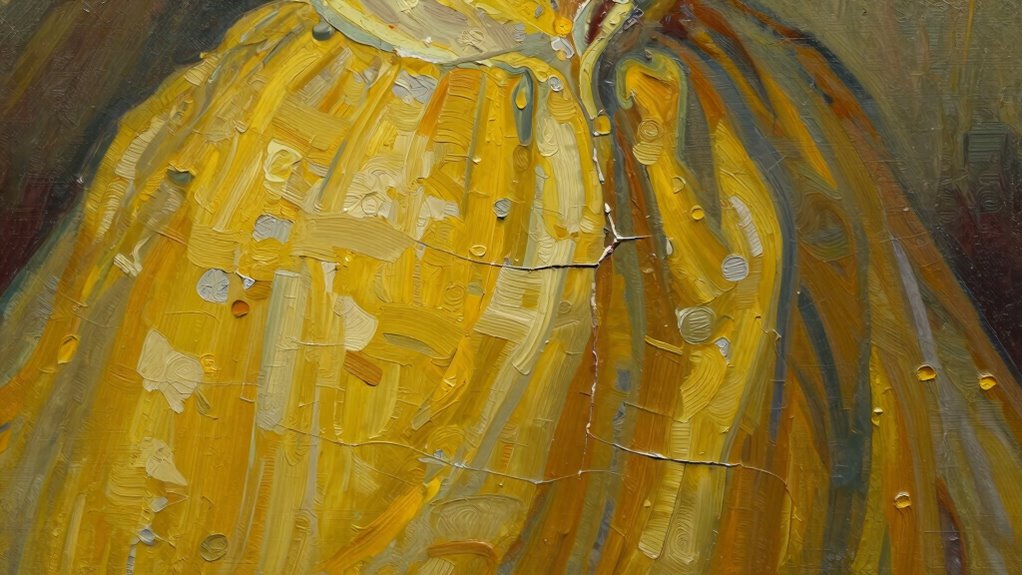
Varnish on oil paintings naturally changes over time due to exposure to environmental factors and the materials used. Varnish aging causes it to yellow or develop cracks, often influenced by the type of varnish and the painting’s environment. As varnish ages, it can become less flexible, leading to cracking or crazing. Additionally, the stability of the pigments underneath plays a role; unstable pigments can react with the varnish, accelerating discoloration or deterioration. Environmental conditions like humidity, temperature fluctuations, and light exposure also contribute to these issues. Over time, the chemical composition of the varnish changes, impacting its appearance and protective qualities. Understanding these factors helps explain why your varnish may yellow or crack, emphasizing the importance of proper conservation. Recognizing the aging process can aid in determining the best approach for restoration and preservation. Proper conservation techniques are essential to slow down these changes and preserve the artwork’s original appearance, especially considering the material stability of the painting components. It is also important to note that environmental control plays a crucial role in mitigating further deterioration over time.

Winsor & Newton Artists' Picture Cleaner, 75ml (2.5-oz) Bottle
A natural resin/oil emulsion containing ammonia designed for cleaning varnished paintings
As an affiliate, we earn on qualifying purchases.
As an affiliate, we earn on qualifying purchases.
Should You Remove Old Varnish? Pros and Cons Explained
Deciding whether to remove old varnish from an oil painting involves weighing the benefits of restoring clarity against potential risks. Removing varnish can enhance the painting’s artistic appearance by revealing original colors and details, especially if the varnish has yellowed or cracked. However, it may also damage the surface if not done carefully. Consider these factors:
| Pros | Cons |
|---|---|
| Restores original vibrancy | Risk of damaging paint layer |
| Improves visibility | Varnish longevity varies |
| Enhances overall clarity | Time-consuming process |
If the varnish is markedly aged or deteriorated, removal might improve the painting’s look. But, if it’s still stable, preservation might be the better choice. Always weigh these pros and cons carefully before proceeding. Additionally, understanding the environmental impact of tissue paper can help in related conservation or framing decisions.

Angelus Matte Acrylic Finisher 4 fl oz – Flexible Clear Coat for Leather Shoes, Bags, Jackets & Accessories, Matte Acrylic Sealer Varnish for Leather Craft & Restoration. No. 620
A simple product to seal in your leather artwork. Currently the lowest shine in a Finisher that Angelus…
As an affiliate, we earn on qualifying purchases.
As an affiliate, we earn on qualifying purchases.
Best Techniques to Restore a Matte, Natural Finish

To restore a matte, natural finish, start with gentle cleaning to remove surface dirt without damaging the paint. If necessary, carefully remove existing varnish using specific matte varnish removal methods to avoid glare or shine. Additionally, selecting the appropriate office gear can help protect and maintain the artwork’s condition during the restoration process. Proper restoration techniques are essential to ensure the longevity of the artwork. It is also important to be aware of early warning signs that may indicate deterioration, so you can address issues promptly before they become more serious. Finally, reapply a thin layer of natural finish varnish to achieve the desired matte look while preserving the artwork’s authenticity.
Gentle Cleaning Techniques
When restoring a matte, natural finish on oil paintings, gentle cleaning is essential to avoid damaging the varnish layer. Use soft brush techniques to remove surface dust and dirt carefully. Light, sweeping motions with a natural bristle brush prevent abrasion and preserve the integrity of the varnish. If necessary, select appropriate cleaning solvents—such as distilled water or mild conservation-grade solutions—that won’t harm the paint or varnish. Test solvents on a small, inconspicuous area first. Avoid aggressive scrubbing or harsh chemicals, which can strip or damage the surface. Always proceed slowly, ensuring you remove only dirt buildup without affecting the original finish. Gentle, controlled cleaning preserves the artwork’s natural matte appearance while safely restoring clarity and vibrancy. Additionally, understanding conservation principles helps ensure that cleaning methods are both effective and safe for the artwork’s long-term preservation. Incorporating proper technique is crucial to avoiding unintended damage during the cleaning process. Employing safe cleaning methods also minimizes the risk of chemical reactions that could harm the paint or varnish over time. Being aware of heat and fumes in fires can inform the safe handling of cleaning agents and materials used in conservation. Recognizing the importance of materials compatibility ensures that cleaning solutions do not react adversely with existing varnishes or paint layers.
Matte Varnish Removal Methods
Removing a matte varnish layer requires careful techniques to restore the artwork’s natural finish without causing damage. Start by choosing the appropriate varnish type—solvent-based or removable acrylics—as each responds differently. Use gentle brush techniques, applying solvents with soft brushes or swabs to carefully loosen the varnish. Work in small sections, monitoring the process closely to prevent over-application. For solvent-based varnishes, test a small area first to ensure compatibility, and avoid aggressive scrubbing. Acrylic varnishes might require specific solvents or mild mechanical removal. Patience is key; take your time to prevent damaging the underlying paint. Always work in a well-ventilated space and wear protective gear. Proper technique ensures safe removal and preserves your artwork’s integrity.
Reapplying a Natural Finish
Are you looking to restore a matte, natural finish to your oil painting? To do so effectively, focus on these key steps:
- Prepare your materials: Use a matte varnish and ensure your workspace is clean. Selecting the right finishing products is crucial for achieving a consistent appearance.
- Color matching: Mix a small amount of varnish with a matte medium to match the original finish and tone. Proper color matching helps maintain the integrity of the artwork’s appearance.
- Brush techniques: Use soft, even strokes with a high-quality brush, applying light layers to avoid streaks. Consistent brushwork prevents uneven textures that can detract from the natural look.
- Application: Work in thin coats, blending gently to maintain a natural look, and allow each layer to dry completely before the next. Patience during drying ensures a smooth, uniform finish.
- Understanding finish types: Recognizing the differences between matte, satin, and gloss varnishes can help you choose the best product for your desired outcome. Knowing these distinctions allows for better control over the final appearance of your artwork.
When Is It Time to Reapply a Varnish Coat: And Why?
Knowing the right time to reapply a varnish coat is essential to maintaining the appearance and protection of your painting. You’ll notice when the varnish begins to dull or develop a yellowish tint, which diminishes color saturation and obscures fine details. Additionally, cracks, surface dirt, or cloudiness indicate it’s time for a fresh coat. Pay attention to your brush techniques—if you’re applying varnish unevenly or with streaks, it may be time to recoat for a smoother finish. Reapplying varnish restores the vibrancy of colors and provides a fresh barrier against dust and environmental damage. Regularly evaluating these signs ensures your artwork stays protected and visually compelling, preventing the need for more extensive restoration later on.
DIY Tips for Cleaning and Revarnishing Your Oil Painting Safely
Cleaning and revarnishing your oil painting can be done safely at home with careful attention to detail. Start by examining the varnish for deterioration, which can cause a dull or sticky surface. Use gentle cleaning techniques to remove surface dust and grime without damaging the paint. When reapplying varnish, follow these steps:
Carefully examine and gently clean your oil painting before reapplying a suitable varnish at home.
- Choose a suitable varnish type, like removable acrylic varnish.
- Test a small area first to ensure compatibility.
- Clean the surface thoroughly using a soft, lint-free cloth.
- Apply the new varnish evenly, avoiding bubbles or streaks.
Always work in a dust-free environment, and avoid aggressive cleaning that can harm the paint beneath. Proper technique guarantees your oil painting remains vibrant and protected.
When to Seek Professional Help for Varnish Restoration

If your painting shows signs of discoloration, cracking, or cloudiness, it’s time to contemplate professional help. Attempting to fix severe damage yourself can cause more harm than good. A restoration expert can preserve your artwork’s integrity and bring out its original beauty.
Signs of Damage
Varnish damage can often be subtle at first, but recognizing the signs early can prevent further deterioration. Pay attention to these indicators that your artwork may need professional help:
- Cloudiness or a milky appearance that dulls the original palette preservation. This often results from UV damage or environmental factors that affect the varnish’s integrity.
- Cracking or crazing on the varnish surface, which can trap dirt and grime. Regular monitoring of environmental conditions can help detect these issues early.
- Discoloration or yellowing that alters the intended colors.
- Increased light sensitivity, causing the painting to fade or change under exposure.
- Regular inspection and proper cleaning techniques can help prolong the integrity of the varnish and prevent the need for extensive restoration. Additionally, understanding the types of varnish used can guide appropriate care and restoration methods.
If you notice any of these signs, it’s best to consult a professional. Proper intervention can restore clarity, protect your artwork, and ensure the varnish continues to serve its protective role without compromising the original colors or light sensitivity.
Professional Restoration Benefits
When signs of varnish damage become evident, consulting a professional restorer is vital to guarantee your artwork’s integrity. Professional restorers have expertise in applying historical techniques that preserve the painting’s authenticity while using modern materials that guarantee durability. They can accurately assess whether the varnish needs removal or reapplication, preventing further harm. Restorers understand how to delicately remove discolored or cracked varnish without damaging the underlying paint. They also employ advanced techniques to match the original finish, maintaining the artwork’s original appearance. Understanding varnish chemistry is crucial for effective restoration, ensuring the longevity of your oil painting. Additionally, employing appropriate paint sprayer techniques and equipment can aid in the preservation process by providing even and controlled application of protective coatings. Seeking expert help ensures your oil painting remains protected and visually appealing for years to come. Trusting professionals provides peace of mind, knowing your cherished piece benefits from precise restoration techniques rooted in both tradition and innovation.
Frequently Asked Questions
Can Varnish Damage the Underlying Paint if Applied Incorrectly?
Yes, if you apply varnish incorrectly, it can damage the underlying paint. Poor application can interfere with varnish curing, leading to a cloudy or sticky surface. It can also affect paint adhesion, causing the varnish to peel or crack over time. To avoid damage, make certain your painting is fully dry, apply thin, even coats, and use the right varnish type for your artwork.
How Often Should I Revarnish an Oil Painting?
Imagine noticing your oil painting’s gloss fading after a few years. You should revarnish about every 3 to 5 years, depending on exposure and condition. Use gentle brush techniques to apply varnish evenly, avoiding streaks. Patience matters—allow sufficient varnish drying time before handling or displaying again. Regular inspection helps determine if revarnishing is needed, ensuring your artwork maintains its vibrancy and protection over time.
Are There Environmentally Friendly Varnish Options Available?
Yes, eco-friendly coatings are available for varnishing your oil paintings. You can opt for natural resin alternatives like damar or copal, which are more environmentally friendly than synthetic options. These natural options provide a protective finish without harmful chemicals, so you’re helping the environment while preserving your artwork. Always check product labels for eco-friendly certifications, and consider using biodegradable varnishes to minimize your ecological footprint.
What Are the Signs of Successful Varnish Removal?
Like a skilled detective, you’ll notice the varnish sheen has faded to a matte or satin finish, indicating successful removal. The surface feels smooth and clean, with no sticky or glossy residue. You’ll see the original paint colors beneath clearly, and the previous shine is gone. Using proper removal techniques, you guarantee no damage remains, revealing the artwork’s true colors and textures for your next step in restoration.
How Does Lighting Affect the Appearance of Varnished Paintings?
Lighting considerably impacts how varnished paintings look. If the light hits the surface at certain angles, glare issues and reflection problems can make details hard to see or distort the artwork’s true colors. You’ll notice uneven shine or unwanted reflections, which can distract from the painting’s beauty. To minimize these effects, you should adjust the lighting, use softer or indirect light, and position yourself to avoid harsh reflections.
Conclusion
Think of your oil painting as a delicate dance between artistry and preservation. When varnish starts to crack or yellow, it’s like a cloudy veil dulling the masterpiece beneath. Knowing when to clean, revarnish, or seek expert help guarantees your artwork shines true again. With gentle care and keen eye, you keep the beauty alive—allowing your painting’s story to sparkle like a star breaking through a stormy sky.